[{"name":"Everest Base Camp Helicopter Tour","duration":"1","image_url":"https:\/\/www.havenholidaysnepal.com\/storage\/trip-galleries\/1\/thumb_6cd53005d75a86e373d31419d1b14d78.webp","offer_price":1195,"url":"https:\/\/www.havenholidaysnepal.com\/trips\/everest-base-camp-helicopter-tour"},{"name":"Everest Mountain Flight","duration":"1","image_url":"https:\/\/www.havenholidaysnepal.com\/storage\/trip-galleries\/4\/thumb_3b0b4f1d6f72b0ad224daf4752f2c6e0.jpg","offer_price":285,"url":"https:\/\/www.havenholidaysnepal.com\/trips\/everest-mountain-flight"},{"name":"Everest Short Trek","duration":"9","image_url":"https:\/\/www.havenholidaysnepal.com\/storage\/trip-galleries\/5\/thumb_BXPP3621.JPEG0.02033800 1727957098.webp","offer_price":895,"url":"https:\/\/www.havenholidaysnepal.com\/trips\/everest-short-trek"},{"name":"Gokyo Valley Trek","duration":"12","image_url":"https:\/\/www.havenholidaysnepal.com\/storage\/trip-galleries\/6\/thumb_10bc469b14731f23d3ce84a7092ad53f.jpg","offer_price":1195,"url":"https:\/\/www.havenholidaysnepal.com\/trips\/gokyo-valley-trek"},{"name":"15 days Annapurna Base Camp Trek","duration":"15","image_url":"https:\/\/www.havenholidaysnepal.com\/storage\/trip-galleries\/7\/thumb_87d1533bc45faf070990aef0579e4be4.jpg0.81855100 1728285496.webp","offer_price":785,"url":"https:\/\/www.havenholidaysnepal.com\/trips\/15-days-annapurna-base-camp-trek"},{"name":"Nepal Pilgrimage Tour","duration":"14","image_url":"https:\/\/www.havenholidaysnepal.com\/storage\/trip-galleries\/8\/thumb_02c3bcf2ad2e8a4c1703e90ae747b5f1.jpg","offer_price":1475,"url":"https:\/\/www.havenholidaysnepal.com\/trips\/nepal-pilgrimage-tour"},{"name":"UNESCO World Heritage Site Tour","duration":"10","image_url":"https:\/\/www.havenholidaysnepal.com\/storage\/trip-galleries\/9\/thumb_unesco-world-heritage-site-Lumbani-temple-buddhists-hindus-kathmandu-nepal0.36988600 17347617740.93089500 1737469667.webp","offer_price":715,"url":"https:\/\/www.havenholidaysnepal.com\/trips\/unesco-world-heritage-site-tour"},{"name":"Island Peak Climbing","duration":"16","image_url":"https:\/\/www.havenholidaysnepal.com\/storage\/trip-galleries\/11\/thumb_Island peak0.53947000 1734692503.webp","offer_price":2495,"url":"https:\/\/www.havenholidaysnepal.com\/trips\/island-peak-climbing"},{"name":"Upper Mustang Trek","duration":"18","image_url":"https:\/\/www.havenholidaysnepal.com\/storage\/trip-galleries\/12\/thumb_upper mustang 7 Oct-2024.jpg0.95398900 1728286166.webp","offer_price":2995,"url":"https:\/\/www.havenholidaysnepal.com\/trips\/upper-mustang-trek"},{"name":"Annapurna Circuit Trek","duration":"16","image_url":"https:\/\/www.havenholidaysnepal.com\/storage\/trip-galleries\/15\/thumb_tibetan-flags.jpg0.04843900 1728289138.webp","offer_price":985,"url":"https:\/\/www.havenholidaysnepal.com\/trips\/annapurna-circuit-trek"},{"name":"Gosainkunda Lake Trek","duration":"10","image_url":"https:\/\/www.havenholidaysnepal.com\/storage\/trip-galleries\/16\/thumb_5A8083B3-C007-41A8-853F-D0C37C97D235_1_105_c.jpeg0.52581200 1731845258.webp","offer_price":595,"url":"https:\/\/www.havenholidaysnepal.com\/trips\/gosainkunda-lake-trek"},{"name":"Zip-lining in Pokhara and Dhulikhel","duration":"1","image_url":"https:\/\/www.havenholidaysnepal.com\/storage\/trip-galleries\/18\/thumb_215f765e2ebc995dd5c800b4bfdbacc3.jpg","offer_price":82,"url":"https:\/\/www.havenholidaysnepal.com\/trips\/zip-lining-in-pokhara-and-dhulikhel"},{"name":"Annapurna Heli Tour","duration":"1","image_url":"https:\/\/www.havenholidaysnepal.com\/storage\/trip-galleries\/19\/thumb_d71a6bbb9fd4da8d1b567a5cdbdec85d.jpg","offer_price":555,"url":"https:\/\/www.havenholidaysnepal.com\/trips\/annapurna-heli-tour"},{"name":"Paragliding in Pokhara","duration":"1","image_url":"https:\/\/www.havenholidaysnepal.com\/storage\/trip-galleries\/20\/thumb_de788d2dd9726783431f882c007efae1.jpg","offer_price":65,"url":"https:\/\/www.havenholidaysnepal.com\/trips\/paragliding-in-pokhara"},{"name":"Ultra-Flight in Pokhara","duration":"1","image_url":"https:\/\/www.havenholidaysnepal.com\/storage\/trip-galleries\/21\/thumb_e27a9fb572a5c21611bb2a3c18e4b8f0.jpeg","offer_price":175,"url":"https:\/\/www.havenholidaysnepal.com\/trips\/ultra-flight-in-pokhara"},{"name":"Sarangkot Hiking","duration":"1","image_url":"https:\/\/www.havenholidaysnepal.com\/storage\/trip-galleries\/22\/thumb_100ef822fea19987166c6c1366215f15.jpg","offer_price":55,"url":"https:\/\/www.havenholidaysnepal.com\/trips\/sarangkot-hiking"},{"name":"Mera Peak Climbing","duration":"18","image_url":"https:\/\/www.havenholidaysnepal.com\/storage\/trip-galleries\/24\/thumb_d16ae3895f678cf26ffbf2455f541fb5.jpg0.31883400 1732617790.webp","offer_price":2475,"url":"https:\/\/www.havenholidaysnepal.com\/trips\/mera-peak-climbing"},{"name":"Lower Dolpo Trek","duration":"18","image_url":"https:\/\/www.havenholidaysnepal.com\/storage\/trip-galleries\/26\/thumb_Dolpo Galary - 1.JPG0.37725200 1727939952.webp","offer_price":2995,"url":"https:\/\/www.havenholidaysnepal.com\/trips\/lower-dolpo-trek"},{"name":"Nagarkot Sunrise\/Sunset Tour","duration":"1","image_url":"https:\/\/www.havenholidaysnepal.com\/storage\/trip-galleries\/27\/thumb_5147a5532644283a380f2e86f3857c13.jpg0.17748000 1728488108.webp","offer_price":30,"url":"https:\/\/www.havenholidaysnepal.com\/trips\/nagarkot-sunrise-sunset-tour"},{"name":"16 day Everest Base Camp Trek","duration":"16","image_url":"https:\/\/www.havenholidaysnepal.com\/storage\/trip-galleries\/28\/thumb_IMG_4311.JPG0.64984800 1727942213.webp","offer_price":1475,"url":"https:\/\/www.havenholidaysnepal.com\/trips\/16-day-everest-base-camp-trek"},{"name":"Ghorepani Poon Hill trek with Jungle Safari and Trishuli River Rafting -13 days","duration":"13","image_url":"https:\/\/www.havenholidaysnepal.com\/storage\/trip-galleries\/29\/thumb_Ghorepani Poon hill.jpg0.48460800 1728281439.webp","offer_price":795,"url":"https:\/\/www.havenholidaysnepal.com\/trips\/ghorepani-poon-hill-trek-with-jungle-safari-and-trishuli-river-rafting--13-days"},{"name":"Mardi Himal Trek","duration":"12","image_url":"https:\/\/www.havenholidaysnepal.com\/storage\/trip-galleries\/30\/thumb_s1.jpg0.62112600 1728200721.webp","offer_price":795,"url":"https:\/\/www.havenholidaysnepal.com\/trips\/mardi-himal-trek"},{"name":"Langtang Valley Trekking","duration":"10","image_url":"https:\/\/www.havenholidaysnepal.com\/storage\/trip-galleries\/31\/thumb_IMG_4702.JPG0.84916500 1727958504.webp","offer_price":685,"url":"https:\/\/www.havenholidaysnepal.com\/trips\/langtang-valley-trekking"},{"name":"Real Adventure Tour in Nepal","duration":"9","image_url":"https:\/\/www.havenholidaysnepal.com\/storage\/trip-galleries\/32\/thumb_ebd1b8cc78d90abe8b9003dd9a2f25bf.jpg0.82151300 1728213516.webp","offer_price":695,"url":"https:\/\/www.havenholidaysnepal.com\/trips\/real-adventure-tour-in-nepal"},{"name":"Luxury Tour in Nepal","duration":"10","image_url":"https:\/\/www.havenholidaysnepal.com\/storage\/trip-galleries\/33\/thumb_8574e61b252b18676b042caf30d830df.jpg","offer_price":1675,"url":"https:\/\/www.havenholidaysnepal.com\/trips\/luxury-tour-in-nepal"},{"name":"Luxury Everest Panorama Trek With EBC Heli Sightseeing","duration":"8","image_url":"https:\/\/www.havenholidaysnepal.com\/storage\/trip-galleries\/34\/thumb_URZL2397.JPEG0.01209600 1728027820.webp","offer_price":2395,"url":"https:\/\/www.havenholidaysnepal.com\/trips\/luxury-everest-panorama-trek-with-ebc-heli-sightseeing"},{"name":"13 day Everest Base Camp Trek with Helicopter","duration":"13","image_url":"https:\/\/www.havenholidaysnepal.com\/storage\/trip-galleries\/35\/thumb_IMG_4292.JPG0.70131500 1728029276.webp","offer_price":2095,"url":"https:\/\/www.havenholidaysnepal.com\/trips\/13-day-everest-base-camp-trek-with-helicopter"},{"name":"Manaslu Circuit Trek","duration":"16","image_url":"https:\/\/www.havenholidaysnepal.com\/storage\/trip-galleries\/36\/thumb_Mt Manaslu 03-Oct-2024.jpg0.65804900 1727938470.webp","offer_price":955,"url":"https:\/\/www.havenholidaysnepal.com\/trips\/manaslu-circuit-trek"},{"name":"Kanchenjunga Base Camp Trek","duration":"21","image_url":"https:\/\/www.havenholidaysnepal.com\/storage\/trip-galleries\/37\/thumb_Kanchanjunga Trek -!.jpg0.54744400 1727938497.webp","offer_price":2275,"url":"https:\/\/www.havenholidaysnepal.com\/trips\/kanchenjunga-base-camp-trek"},{"name":"Ganesh Himal and Sing-La Trek","duration":"18","image_url":"https:\/\/www.havenholidaysnepal.com\/storage\/trip-galleries\/38\/thumb_Ganesh Himal slider-1.jpg0.43764500 1727937722.webp","offer_price":2975,"url":"https:\/\/www.havenholidaysnepal.com\/trips\/ganesh-himal-and-sing-la-trek"},{"name":"Island Peak Climb with Everest Base Camp Trek","duration":"21","image_url":"https:\/\/www.havenholidaysnepal.com\/storage\/trip-galleries\/39\/thumb_2be428730fe83525bc85a010564f99de.jpg","offer_price":2750,"url":"https:\/\/www.havenholidaysnepal.com\/trips\/island-peak-climb-with-everest-base-camp-trek"},{"name":"Students' Adventure Tour in Nepal","duration":"12","image_url":"https:\/\/www.havenholidaysnepal.com\/storage\/trip-galleries\/41\/thumb_a926d22fbfe08cba271c41ac289b3fd2.jpg","offer_price":995,"url":"https:\/\/www.havenholidaysnepal.com\/trips\/students-adventure-tour-in-nepal"},{"name":"7 Day Poonhill Trek","duration":"7","image_url":"https:\/\/www.havenholidaysnepal.com\/storage\/trip-galleries\/42\/thumb_6196bd69036473293a2c24cc21ed57d7.jpg0.10880600 1728205378.webp","offer_price":555,"url":"https:\/\/www.havenholidaysnepal.com\/trips\/7-day-poonhill-trek"},{"name":"7 Days Annapurna Base Camp Trek","duration":"7","image_url":"https:\/\/www.havenholidaysnepal.com\/storage\/trip-galleries\/43\/thumb_IMG_2214.JPG0.08204900 1728202033.webp","offer_price":355,"url":"https:\/\/www.havenholidaysnepal.com\/trips\/7-days-annapurna-base-camp-trek"},{"name":"3 days Poonhill Trek","duration":"3","image_url":"https:\/\/www.havenholidaysnepal.com\/storage\/trip-galleries\/44\/thumb_Poon hill.jpg0.60816600 1731412954.webp","offer_price":165,"url":"https:\/\/www.havenholidaysnepal.com\/trips\/3-days-poonhill-trek"},{"name":"Poon Hill Luxury Trek with Chitwan-12 days","duration":"12","image_url":"https:\/\/www.havenholidaysnepal.com\/storage\/trip-galleries\/45\/thumb_Poom hill.jpg0.52074500 1730180532.webp","offer_price":1175,"url":"https:\/\/www.havenholidaysnepal.com\/trips\/poon-hill-luxury-trek-with-chitwan-12-days"},{"name":"Everest Luxury Trek-7 days","duration":"7","image_url":"https:\/\/www.havenholidaysnepal.com\/storage\/trip-galleries\/46\/thumb_ACRX9330.JPEG0.93236200 1728031275.webp","offer_price":2395,"url":"https:\/\/www.havenholidaysnepal.com\/trips\/everest-luxury-trek-7-days"},{"name":"Hindu Pilgrimage Tour in Nepal-10 days","duration":"10","image_url":"https:\/\/www.havenholidaysnepal.com\/storage\/trip-galleries\/47\/thumb_a94bf96a4d31decb419f6f828a3280d2.jpg","offer_price":995,"url":"https:\/\/www.havenholidaysnepal.com\/trips\/hindu-pilgrimage-tour-in-nepal-10-days"},{"name":"Everest Base Camp Short Trek-12 days","duration":"12","image_url":"https:\/\/www.havenholidaysnepal.com\/storage\/trip-galleries\/48\/thumb_IMG_4311.JPG0.52680100 1727945154.webp","offer_price":995,"url":"https:\/\/www.havenholidaysnepal.com\/trips\/everest-base-camp-short-trek-12-days"},{"name":"Everest Base Camp Hike 12 Days","duration":"12","image_url":"https:\/\/www.havenholidaysnepal.com\/storage\/trip-galleries\/49\/thumb_IMG_4260.JPG0.51729100 1728061234.webp","offer_price":1295,"url":"https:\/\/www.havenholidaysnepal.com\/trips\/everest-base-camp-hike-12-days"},{"name":"11 Days Everest Base Camp Trek","duration":"11","image_url":"https:\/\/www.havenholidaysnepal.com\/storage\/trip-galleries\/50\/thumb_IMG_4249.JPG0.21392500 1727946959.webp","offer_price":985,"url":"https:\/\/www.havenholidaysnepal.com\/trips\/11-days-everest-base-camp-trek"},{"name":"6 Days Annapurna Base Camp Trek","duration":"6","image_url":"https:\/\/www.havenholidaysnepal.com\/storage\/trip-galleries\/51\/thumb_6 days Abc.jpg0.58185400 1728200798.webp","offer_price":285,"url":"https:\/\/www.havenholidaysnepal.com\/trips\/6-days-annapurna-base-camp-trek"},{"name":"Annapurna Base Camp Trek","duration":"8","image_url":"https:\/\/www.havenholidaysnepal.com\/storage\/trip-galleries\/52\/thumb_IMG_2214.JPG0.29415700 1729487656.webp","offer_price":585,"url":"https:\/\/www.havenholidaysnepal.com\/trips\/annapurna-base-camp-trek"},{"name":"Everest Base Camp Trek with Helicopter Fly Out 10 Days","duration":"10","image_url":"https:\/\/www.havenholidaysnepal.com\/storage\/trip-galleries\/53\/thumb_IMG_4328.JPG0.52056600 1728058444.webp","offer_price":1875,"url":"https:\/\/www.havenholidaysnepal.com\/trips\/everest-base-camp-trek-with-helicopter-fly-out-10-days"},{"name":"Everest Base Camp Trek 14 Days","duration":"14","image_url":"https:\/\/www.havenholidaysnepal.com\/storage\/trip-galleries\/54\/thumb_Everest Base Camp Trek 14 days Oct 3 2024.JPG0.43202700 1727939745.webp","offer_price":1235,"url":"https:\/\/www.havenholidaysnepal.com\/trips\/everest-base-camp-trek-14-days"},{"name":"ABC Trek with Poonhill 11 Days","duration":"11","image_url":"https:\/\/www.havenholidaysnepal.com\/storage\/trip-galleries\/55\/thumb_ABC with fishtail.JPG0.21441100 1728277965.webp","offer_price":555,"url":"https:\/\/www.havenholidaysnepal.com\/trips\/abc-trek-with-poonhill-11-days"},{"name":"Muldai Hill Trek 9 Days","duration":"9","image_url":"https:\/\/www.havenholidaysnepal.com\/storage\/trip-galleries\/56\/thumb_7efee59f0a8c6817c8255bd2b9f3539d.jpeg0.19479300 1728213091.webp","offer_price":675,"url":"https:\/\/www.havenholidaysnepal.com\/trips\/muldai-hill-trek-9-days"},{"name":"Mardi Himal Trek 6 days","duration":"6","image_url":"https:\/\/www.havenholidaysnepal.com\/storage\/trip-galleries\/57\/thumb_slider 1.jpeg0.36909700 1728184981.webp","offer_price":590,"url":"https:\/\/www.havenholidaysnepal.com\/trips\/mardi-himal-trek-6-days"},{"name":"Mardi Himal Trek 7 days","duration":"7","image_url":"https:\/\/www.havenholidaysnepal.com\/storage\/trip-galleries\/58\/thumb_slider1.jpg0.61666600 1728206414.webp","offer_price":620,"url":"https:\/\/www.havenholidaysnepal.com\/trips\/mardi-himal-trek-7-days"},{"name":"Mardi Himal Trek 8 Days","duration":"8","image_url":"https:\/\/www.havenholidaysnepal.com\/storage\/trip-galleries\/59\/thumb_sli1.jpg0.38569100 1728206631.webp","offer_price":695,"url":"https:\/\/www.havenholidaysnepal.com\/trips\/mardi-himal-trek-8-days"},{"name":"14 Days Manaslu Trek","duration":"14","image_url":"https:\/\/www.havenholidaysnepal.com\/storage\/trip-galleries\/60\/thumb_sunrise-mt-manaslu-during-manaslu-circuit-larke-pass-trekking-himalaya-nepal (1)0.81855800 1738673284.webp","offer_price":885,"url":"https:\/\/www.havenholidaysnepal.com\/trips\/14-days-manaslu-trek"},{"name":"Dhampus-Sarangkot Trek with Chitwan 8 days","duration":"8","image_url":"https:\/\/www.havenholidaysnepal.com\/storage\/trip-galleries\/61\/thumb_Sarangkot Bhangyang.jpg0.75461400 1728210333.webp","offer_price":790,"url":"https:\/\/www.havenholidaysnepal.com\/trips\/dhampus-sarangkot-trek-with-chitwan-8-days"},{"name":"7 Days Golden Triangle Tour","duration":"7","image_url":"https:\/\/www.havenholidaysnepal.com\/storage\/trip-galleries\/62\/thumb_311ce1d117ee0ba75402a7c301bcdf830.73532400 1739179809.webp","offer_price":845,"url":"https:\/\/www.havenholidaysnepal.com\/trips\/7-days-golden-triangle-tour"},{"name":"Annapurna Circuit Trek 12 days","duration":"12","image_url":"https:\/\/www.havenholidaysnepal.com\/storage\/trip-galleries\/63\/thumb_IMG_20161024_092237.jpg0.57796600 1728289938.webp","offer_price":695,"url":"https:\/\/www.havenholidaysnepal.com\/trips\/annapurna-circuit-trek-12-days"},{"name":"Everest Base Camp Budget Trek 16 Days","duration":"16","image_url":"https:\/\/www.havenholidaysnepal.com\/storage\/trip-galleries\/64\/thumb_IMG_4423.JPG0.92579200 1728144669.webp","offer_price":958,"url":"https:\/\/www.havenholidaysnepal.com\/trips\/everest-base-camp-budget-trek-16-days"},{"name":"Poonhill Budget Trek 7 Days","duration":"7","image_url":"https:\/\/www.havenholidaysnepal.com\/storage\/trip-galleries\/65\/thumb_5be067852d0c5228d6f3155bc425c6b5.jpg","offer_price":395,"url":"https:\/\/www.havenholidaysnepal.com\/trips\/poonhill-budget-trek-7-days"},{"name":"Annapurna Base Camp Budget Trek 8 Days","duration":"8","image_url":"https:\/\/www.havenholidaysnepal.com\/storage\/trip-galleries\/66\/thumb_Pokhara.jpg0.16188000 1728212001.webp","offer_price":375,"url":"https:\/\/www.havenholidaysnepal.com\/trips\/annapurna-base-camp-budget-trek-8-days"},{"name":"The Real UNESCO Seven World Heritage Tour in Kathmandu 4 days","duration":"4","image_url":"https:\/\/www.havenholidaysnepal.com\/storage\/trip-galleries\/67\/thumb_Baudha Stupa.JPG0.63906900 1728201021.webp","offer_price":380,"url":"https:\/\/www.havenholidaysnepal.com\/trips\/the-real-unesco-seven-world-heritage-tour-in-kathmandu-4-days"},{"name":"Everest Base Camp Jeep Ride with Helicopter Return","duration":"14","image_url":"https:\/\/www.havenholidaysnepal.com\/storage\/trip-galleries\/68\/thumb_788ee5b63a6efb6f3c3d048b4270daca.JPG","offer_price":1895,"url":"https:\/\/www.havenholidaysnepal.com\/trips\/everest-base-camp-jeep-ride-with-helicopter-return"},{"name":"Annapurna Base Camp Jeep Ride with Helicopter Return 7 days","duration":"7","image_url":"https:\/\/www.havenholidaysnepal.com\/storage\/trip-galleries\/69\/thumb_abc jeep.jpg0.10280600 1728204064.webp","offer_price":1455,"url":"https:\/\/www.havenholidaysnepal.com\/trips\/annapurna-base-camp-jeep-ride-with-helicopter-return-7-days"},{"name":"Everest Base Camp Trek","duration":"15","image_url":"https:\/\/www.havenholidaysnepal.com\/storage\/trip-galleries\/70\/thumb_Everest Base Camp Trek 3 oct- 2024.JPG0.58445300 1727941472.webp","offer_price":1355,"url":"https:\/\/www.havenholidaysnepal.com\/trips\/everest-base-camp-trek"},{"name":"7 UNESCO World Heritage Tour Kathmandu 2 days","duration":"2","image_url":"https:\/\/www.havenholidaysnepal.com\/storage\/trip-galleries\/72\/thumb_Bhaktipur 3.jpg0.05559600 1728201496.webp","offer_price":150,"url":"https:\/\/www.havenholidaysnepal.com\/trips\/7-unesco-world-heritage-tour-kathmandu-2-days"},{"name":"Day Tour to UNESCO Heritage Sites","duration":"1","image_url":"https:\/\/www.havenholidaysnepal.com\/storage\/trip-galleries\/73\/thumb_228A1018.jpg0.79892500 1728199793.webp","offer_price":55,"url":"https:\/\/www.havenholidaysnepal.com\/trips\/day-tour-to-unesco-heritage-sites"},{"name":"Golden Triangle Tour in Nepal","duration":"8","image_url":"https:\/\/www.havenholidaysnepal.com\/storage\/trip-galleries\/74\/thumb_f54139cf9100f00015ffe0400687e946.webp","offer_price":588,"url":"https:\/\/www.havenholidaysnepal.com\/trips\/golden-triangle-tour-in-nepal"},{"name":"Everest Base Camp Honeymoon Tour by Helicopter with Pokhara","duration":"7 days","image_url":"https:\/\/www.havenholidaysnepal.com\/storage\/trip-galleries\/76\/thumb_RJTL7517.JPEG0.40261600 1731499989.webp","offer_price":9999,"url":"https:\/\/www.havenholidaysnepal.com\/trips\/everest-base-camp-honeymoon-tour-by-helicopter-with-pokhara"},{"name":"Yoga and Meditation Retreat Tour in Nepal","duration":"10 days","image_url":"https:\/\/www.havenholidaysnepal.com\/storage\/trip-galleries\/77\/thumb_decf8e33-6617-4400-9df0-63bf75509adf.JPG0.51948300 1731574810.webp","offer_price":2575,"url":"https:\/\/www.havenholidaysnepal.com\/trips\/yoga-and-meditation-retreat-tour-in-nepal"},{"name":"Chisapani-Nagarkot Trek","duration":"3","image_url":"https:\/\/www.havenholidaysnepal.com\/storage\/trip-galleries\/78\/thumb_0b64dfceaeab48ac36d685476bdebafb.webp","offer_price":165,"url":"https:\/\/www.havenholidaysnepal.com\/trips\/chisapani-nagarkot-trek"},{"name":"Chitwan Jungle Safari Tour","duration":"2","image_url":"https:\/\/www.havenholidaysnepal.com\/storage\/trip-galleries\/79\/thumb_IMG_1696.JPG0.28467800 1733054554.webp","offer_price":175,"url":"https:\/\/www.havenholidaysnepal.com\/trips\/chitwan-jungle-safari-tour"},{"name":"Kailash Overland Tour","duration":"16","image_url":"https:\/\/www.havenholidaysnepal.com\/storage\/trip-galleries\/80\/thumb_PA2605230.68496700 1735818657.webp","offer_price":2495,"url":"https:\/\/www.havenholidaysnepal.com\/trips\/kailash-overland-tour"},{"name":"4 nights 5 days Bhutan Tour","duration":"5","image_url":"https:\/\/www.havenholidaysnepal.com\/storage\/trip-galleries\/81\/thumb_PB0508470.23069500 1735828937.webp","offer_price":1265,"url":"https:\/\/www.havenholidaysnepal.com\/trips\/4-nights-5-days-bhutan-tour"},{"name":"Everest Base Camp Trek Without Flying","duration":"16","image_url":"https:\/\/www.havenholidaysnepal.com\/storage\/trip-galleries\/82\/thumb_308b054484eddc042e092e1ae2ae5586.webp","offer_price":685,"url":"https:\/\/www.havenholidaysnepal.com\/trips\/everest-base-camp-trek-without-flying"},{"name":"Everest Base Camp Trek by Land","duration":"16","image_url":"https:\/\/www.havenholidaysnepal.com\/storage\/trip-galleries\/83\/thumb_8f0f2784a3ae7343d193b64fe8d47c96.webp","offer_price":675,"url":"https:\/\/www.havenholidaysnepal.com\/trips\/everest-base-camp-trek-by-land"},{"name":"Everest Base Camp Trek by Jeep","duration":"16","image_url":"https:\/\/www.havenholidaysnepal.com\/storage\/trip-galleries\/84\/thumb_f82b3acdfc933bc3e0197624c001b0a6.webp","offer_price":675,"url":"https:\/\/www.havenholidaysnepal.com\/trips\/everest-base-camp-trek-by-jeep"},{"name":"Everest Base Camp Trek without Lukla Flight","duration":"16","image_url":"https:\/\/www.havenholidaysnepal.com\/storage\/trip-galleries\/85\/thumb_2d0acc76dc958e3122a3745074989914.webp","offer_price":675,"url":"https:\/\/www.havenholidaysnepal.com\/trips\/everest-base-camp-trek-without-lukla-flight"},{"name":"Langtang Valley Trek","duration":"7","image_url":"https:\/\/www.havenholidaysnepal.com\/storage\/trip-galleries\/86\/thumb_a845db06c5feada1478e8aed659fce97.webp","offer_price":199,"url":"https:\/\/www.havenholidaysnepal.com\/trips\/langtang-valley-trek"},{"name":"Everest Base Camp Trek with Gokyo Lake","duration":"17","image_url":"https:\/\/www.havenholidaysnepal.com\/storage\/trip-galleries\/87\/thumb_c6aa32f7654f2eda78134bc84ac70b79.webp","offer_price":1885,"url":"https:\/\/www.havenholidaysnepal.com\/trips\/everest-base-camp-trek-with-gokyo-lake"},{"name":"Everest Three Passes Trek","duration":"19","image_url":"https:\/\/www.havenholidaysnepal.com\/storage\/trip-galleries\/88\/thumb_db5364eaab56f5755da55868f8ca4258.webp","offer_price":1735,"url":"https:\/\/www.havenholidaysnepal.com\/trips\/everest-three-passes-trek"},{"name":"Annapurna Base Camp Trek From Pokhara","duration":"5","image_url":"https:\/\/www.havenholidaysnepal.com\/storage\/trip-galleries\/89\/thumb_49c813cf1054ff06108963924a78ee88.webp","offer_price":255,"url":"https:\/\/www.havenholidaysnepal.com\/trips\/annapurna-base-camp-trek-from-pokhara"},{"name":"Sarangkot Sunrise Tour from Pokhara","duration":"1","image_url":"https:\/\/www.havenholidaysnepal.com\/storage\/trip-galleries\/90\/thumb_932d995b8fb702634a23e8f9a0432c6e.webp","offer_price":35,"url":"https:\/\/www.havenholidaysnepal.com\/trips\/sarangkot-sunrise-tour-from-pokhara"},{"name":"Langtang Valley Trek-8 days","duration":"8","image_url":"https:\/\/www.havenholidaysnepal.com\/storage\/trip-galleries\/91\/thumb_81d3d0a6979c9ed01f65d5ade53820b2.webp","offer_price":250,"url":"https:\/\/www.havenholidaysnepal.com\/trips\/langtang-valley-trek-8-days"},{"name":"Manaslu Circuit Trek 12 days","duration":"12","image_url":"https:\/\/www.havenholidaysnepal.com\/storage\/trip-galleries\/92\/thumb_d8251bbef0c8a246a02bda5c150a27c2.webp","offer_price":675,"url":"https:\/\/www.havenholidaysnepal.com\/trips\/manaslu-circuit-trek-12-days"},{"name":"2 Days Poon Hill Trek","duration":"2","image_url":"https:\/\/www.havenholidaysnepal.com\/storage\/trip-galleries\/93\/thumb_9d8fa8f60767538857d6c7cb3a7fee8b.webp","offer_price":135,"url":"https:\/\/www.havenholidaysnepal.com\/trips\/2-days-poon-hill-trek"},{"name":"Upper Mustang Jeep Tour","duration":"6","image_url":"https:\/\/www.havenholidaysnepal.com\/storage\/trip-galleries\/94\/thumb_9a3098a6c860b87ad3339773ef5435b9.webp","offer_price":1095,"url":"https:\/\/www.havenholidaysnepal.com\/trips\/upper-mustang-jeep-tour"},{"name":"Tsum Valley Trek","duration":"11","image_url":"https:\/\/www.havenholidaysnepal.com\/storage\/trip-galleries\/95\/thumb_704a6a1eb293553827633dbd8ad7d22c.webp","offer_price":775,"url":"https:\/\/www.havenholidaysnepal.com\/trips\/tsum-valley-trek"},{"name":"Mardi Himal Trek from Pokhara","duration":"4","image_url":"https:\/\/www.havenholidaysnepal.com\/storage\/trip-galleries\/96\/thumb_c92e9ee49c2564a11c7a9ba593439efc.webp","offer_price":295,"url":"https:\/\/www.havenholidaysnepal.com\/trips\/mardi-himal-trek-from-pokhara"},{"name":"4 Days Poon Hill Trek","duration":"4","image_url":"https:\/\/www.havenholidaysnepal.com\/storage\/trip-galleries\/97\/thumb_c349e182edd0858f3e3409d945f0d2ec.webp","offer_price":215,"url":"https:\/\/www.havenholidaysnepal.com\/trips\/4-days-poon-hill-trek"},{"name":"Poon Hill Sunrise Jeep Tour from Pokhara","duration":"2","image_url":"https:\/\/www.havenholidaysnepal.com\/storage\/trip-galleries\/98\/thumb_509875052b16f6f9156db386e3592eb8.webp","offer_price":260,"url":"https:\/\/www.havenholidaysnepal.com\/trips\/poon-hill-sunrise-jeep-tour-from-pokhara"},{"name":"Muktinath Jeep Tour from Pokhara","duration":"3","image_url":"https:\/\/www.havenholidaysnepal.com\/storage\/trip-galleries\/99\/thumb_1651790cb7422703fe86d472a35d4f90.webp","offer_price":255,"url":"https:\/\/www.havenholidaysnepal.com\/trips\/muktinath-jeep-tour-from-pokhara"},{"name":"Ghorepani Poon Hill Trek from Pokhara","duration":"5","image_url":"https:\/\/www.havenholidaysnepal.com\/storage\/trip-galleries\/100\/thumb_27fa62452af4ea8e08544aaa035cc446.webp","offer_price":295,"url":"https:\/\/www.havenholidaysnepal.com\/trips\/ghorepani-poon-hill-trek-from-pokhara"},{"name":"Ghandruk, Poon Hill, Muktinath and Upper Mustang Tour","duration":"7 days","image_url":"https:\/\/www.havenholidaysnepal.com\/storage\/trip-galleries\/101\/thumb_a7dd15032cd9693005233b1df7dc63d3.webp","offer_price":685,"url":"https:\/\/www.havenholidaysnepal.com\/trips\/ghandruk-poon-hill-muktinath-and-upper-mustang-tour"},{"name":"Nar Phu Valley Trek with Annapurna Circuit","duration":"16 days","image_url":"https:\/\/www.havenholidaysnepal.com\/storage\/trip-galleries\/102\/thumb_21f5af1d6f698a6898b64413bcc19c69.webp","offer_price":1395,"url":"https:\/\/www.havenholidaysnepal.com\/trips\/nar-phu-valley-trek-with-annapurna-circuit"},{"name":"Poon Hill-Jhino Danda Hot Spring Trek","duration":"4","image_url":"https:\/\/www.havenholidaysnepal.com\/storage\/trip-galleries\/103\/thumb_b1a8563edaf102468aab613332282c6c.webp","offer_price":215,"url":"https:\/\/www.havenholidaysnepal.com\/trips\/poon-hill-jhino-danda-hot-spring-trek"},{"name":"Annapurna Base Camp Trek with Helicopter Return","duration":"4","image_url":"https:\/\/www.havenholidaysnepal.com\/storage\/trip-galleries\/104\/thumb_928d650987e2db5f449127b41966da53.webp","offer_price":895,"url":"https:\/\/www.havenholidaysnepal.com\/trips\/annapurna-base-camp-trek-with-helicopter-return"},{"name":"Annapurna Circuit with Tilicho Lake Trek","duration":"10","image_url":"https:\/\/www.havenholidaysnepal.com\/storage\/trip-galleries\/105\/thumb_a8c9d8bf4041c0fa676d6c239abfd24c.webp","offer_price":615,"url":"https:\/\/www.havenholidaysnepal.com\/trips\/annapurna-circuit-with-tilicho-lake-trek"}]
How to Train Physically for Annapurna Base Camp Trek?
How to Train Physically for Annapurna Base Camp Trek?
Why Physical Preparation Matters for the Annapurna Base Camp Trek
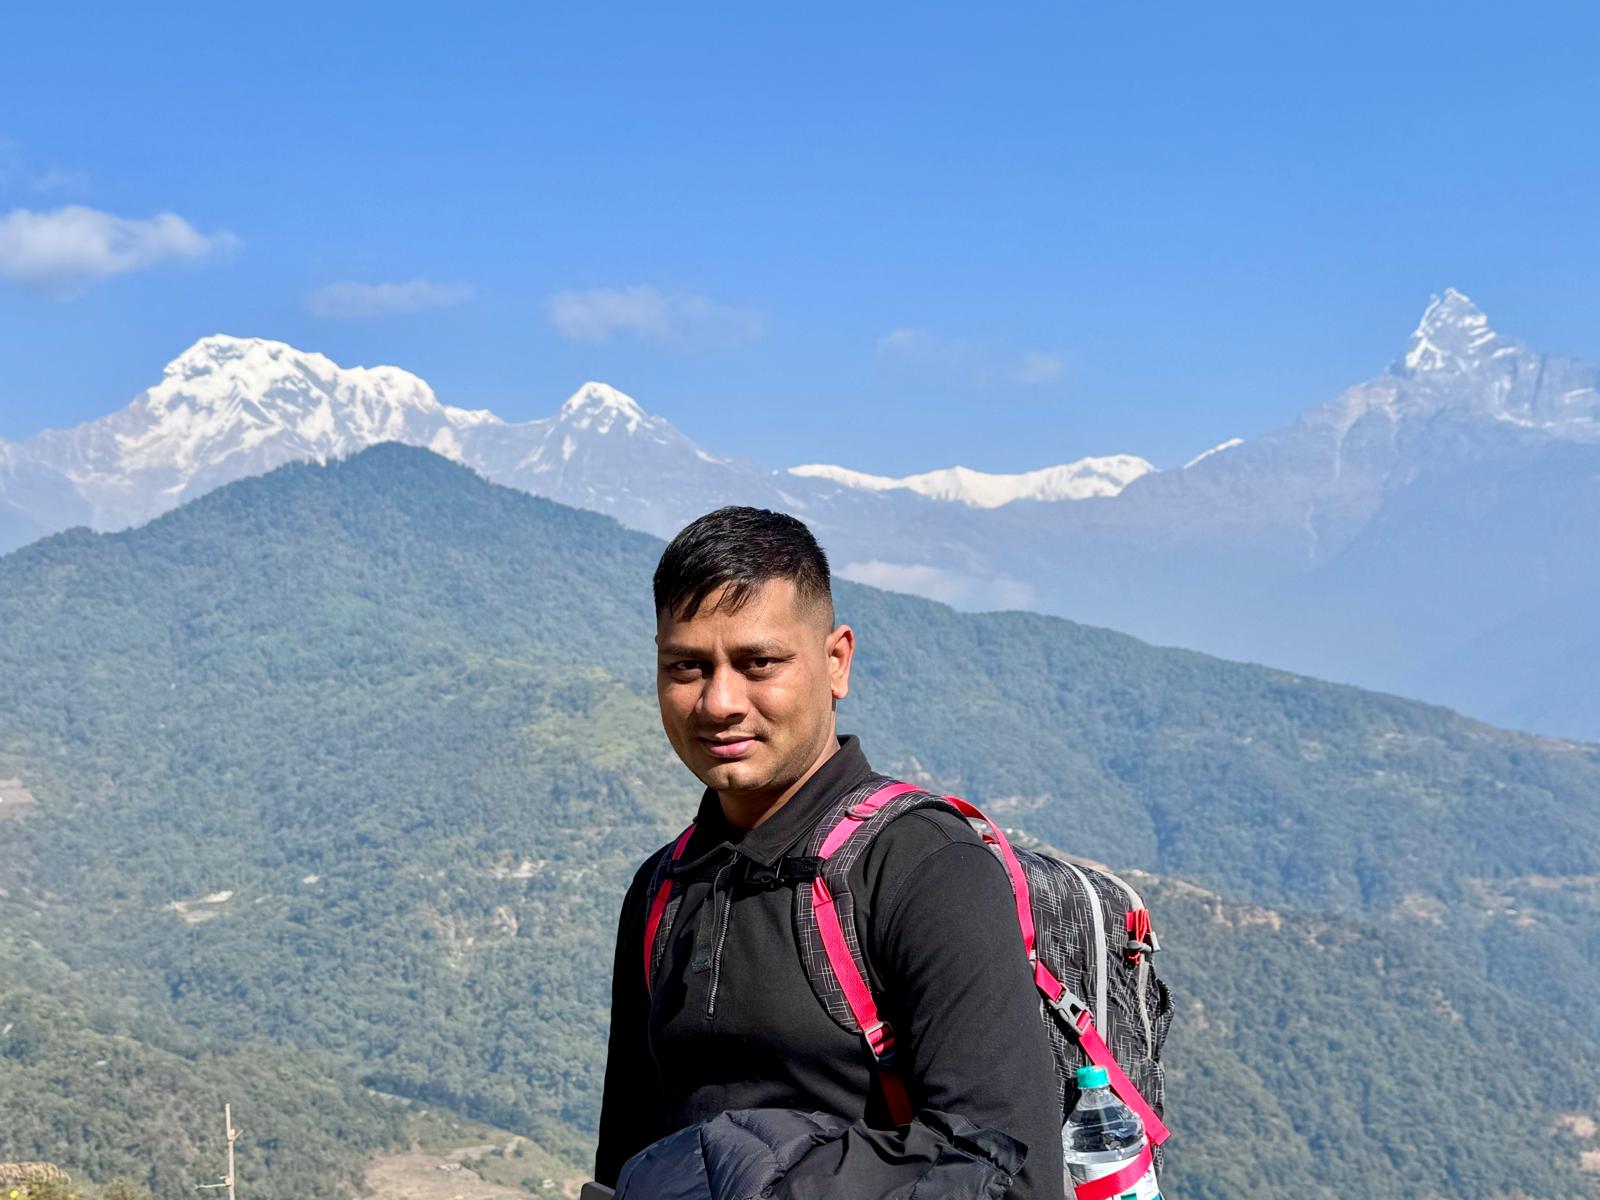
Meanwhile, people sign up for the Annapurna Base Camp Trek because the mountain views are truly breathtaking—Annapurna I rises up to 8,091 meters (26,545 feet). But here’s the thing: this trek isn’t easy. The altitude alone can knock you off your feet if you’re not ready. You need to train for it. Building up your endurance helps your body adapt to the thinner air, and honestly, without that preparation, you’ll feel the fatigue way sooner than you expect. A lot of beginners think they can just wing it, but the smart ones start working on their fitness months in advance.
Likewise, the ABC trek climbs all the way to 4,130 meters (13,550 feet) at Annapurna Base Camp, and the elevation jumps pretty fast. That’s when altitude sickness sneaks up on people who haven’t built up their stamina. Your lungs and heart have to work overtime as the oxygen drops, but regular cardio training really pays off. It boosts your circulation, helps you breathe easier, and keeps those headaches and waves of nausea away. When you’ve done your homework, starting from Pokhara at just 822 meters (2,700 feet) doesn’t feel so daunting.
And it’s not just the altitude. The trail itself can be brutal: endless stone steps, rocky climbs, and uneven ground. Your legs need to be strong, or you risk tweaking something on a long day. You’ll cross rivers, wind through forests, and balance a heavy backpack—core exercises help with that. Some days you’re hiking for five to eight hours, so stamina really matters. If you haven’t put in the work, your muscles let you know pretty quick. But with the right training, the trek feels a lot smoother.
Actually, physical preparation isn’t just about the body, either. It sharpens your mind, too. When you’ve trained, you feel more confident, ready for whatever the trail throws at you—like the climb up to Machhapuchhre Base Camp at 3,700 meters (12,140 feet). Consistency is everything. People who stick to their routines find the whole experience way more enjoyable, with energy left to really soak in those epic views.
In fact, skip the training, and you pay for it. Exhaustion sets in, and you end up missing some of the best parts—like wandering through those bright rhododendron forests. The folks who come back with great stories all say the same thing: putting in the work beforehand turns the trek into something unforgettable.
Here’s why physical training makes all the difference on the Annapurna Base Camp Trek:
Builds up endurance for those daily climbs, so you won’t burn out early, especially starting from Nayapul at 1,070 meters (3,510 feet).
Lowers the risk of altitude sickness at places like Deurali (3,200 meters/10,500 feet), letting you adjust safely.
Strengthens your legs and core, so steep sections and rocky trails don’t beat you up.
Lets you actually enjoy the views, because you’ll have the energy to take it all in.
Prepares your mind for changing weather and the tough, remote stretches of the route.
Location
Elevation (m)
Elevation (ft) | Notes
Pokhara (Start)
822
2,700 | Lakeside city, easy start.
Nayapul
1,070
3,510 | Trailhead, first uphill.
Ghorepani
2,870
9,410 | Steep climb, rhododendron forests.
Chhomrong
2,170
7,120 | Village, lots of stone steps.
Deurali
3,200
10,500 | Forested trail, river crossings.
Machhapuchhre Base Camp
3,700
12,140 | High meadow, snowy views.
Annapurna Base Camp
4,130
13,550 | Glacier basin, mountain panoramas.
Annapurna I (Peak)
8,091
26,545 | Enormous summit (not climbed on this trek).
Knowing the elevations helps you plan your training, too. Here’s a quick look at the main stops along the way :
When you’re training for Annapurna, don’t just do one thing. Mix up your workouts—run, cycle, hike hills, add some strength training. It all helps. Think about what the trek will demand, and aim to match it. Fitness routines focused on “physical conditioning for Nepal treks” keep you safe and help you enjoy the adventure so much more.
Further, physical preparation is what turns a tough trek into an amazing experience. You get to connect with the mountains, enjoy the company of other trekkers, and feel that sense of accomplishment with every step. If you’re thinking about the Annapurna Base Camp, start training now. You’ll thank yourself on the trail.
Understanding the Physical Demands: Distance, Elevation, and Terrain
Actually, the Annapurna Base Camp Trek isn’t just a walk in the park. You’re looking at a round-trip of about 110 to 120 kilometers (68 to 75 miles), spread over 7 to 12 days, depending on your pace and plan. On most days, you’ll cover 10 to 15 kilometers, but there are tougher stretches where you might hit 15 to 20, all while navigating terrain that never really settles into a routine. You need to pace yourself and keep your energy up—cardio fitness matters here. People often search up “Annapurna Base Camp Trek total distance” to see what they’re getting into, but honestly, the real challenge is in stringing together all those days across ever-changing paths.
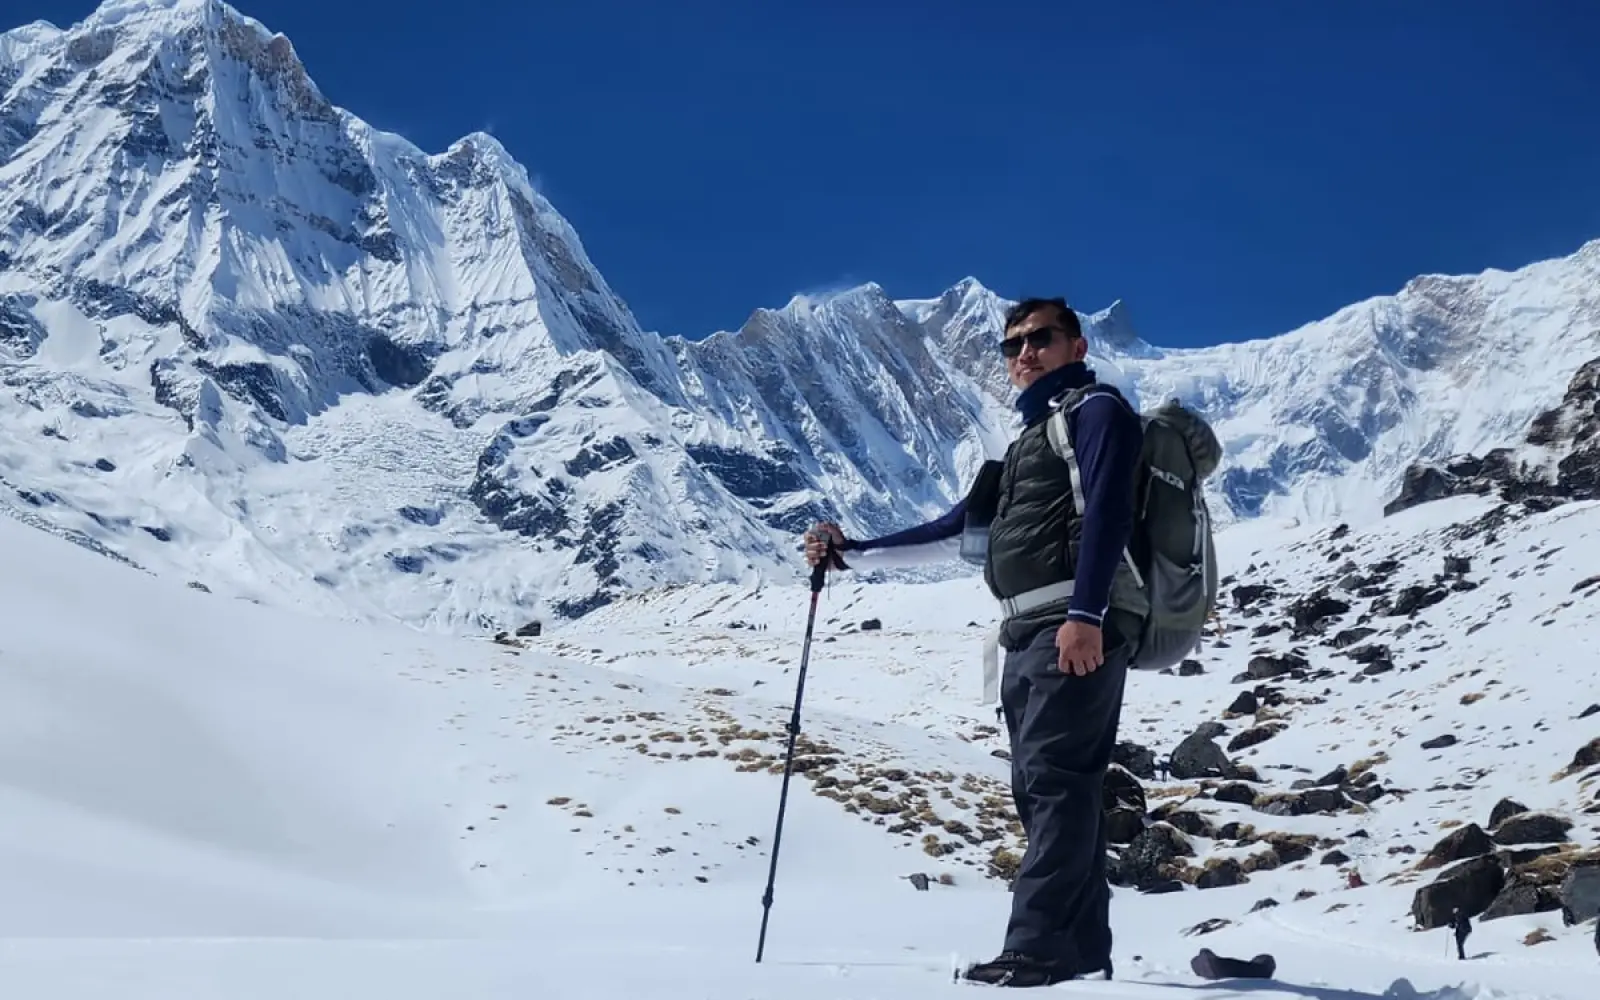
Now, let’s talk about the climbs. The trek starts around 1,000-1,500 meters (3,280-4,920 feet) and tops out at Annapurna Base Camp, which sits at 4,130 meters (13,550 feet). Over the course of the trek, you gain about 3,000 to 4,000 meters in elevation, and it’s not just one big climb—there are constant ups and downs that really work your legs. The steepest gains come as you get higher, especially near Machhapuchhre Base Camp at 3,700 meters (12,140 feet). Acclimatization isn’t just a buzzword here. You have to take it seriously as you climb, or you’ll feel every meter. Training for this trek means getting used to these elevation changes, and honestly, doing some hill work before you arrive helps a ton.
Meanwhile, the ground you cover keeps things interesting. Early on, you’ll battle endless stone staircases—Ulleri is notorious for this, with thousands of steps. Later, you’ll hit rocky trails, forest paths, and even some smooth meadows as you get closer to Deurali (3,200 meters/10,500 feet). The terrain constantly shifts, so you need steady ankles and good balance. If you’re getting ready for one of Nepal’s high-altitude treks, don’t just walk flat city streets—train on mixed surfaces to get your body used to the variety.
Add it all up: distance, elevation, and tricky terrain mean you’re hiking 5 to 8 hours most days, carrying whatever you need for the day. It’s a solid workout, day after day. Understanding these demands isn’t just about checking off a list—it actually shapes how you should train. Search terms like “Annapurna Base Camp Trek elevation profile and terrain” help set expectations, but really, you’ll enjoy the mountain views and rhododendron forests a lot more if you’ve put in the work beforehand.
If you ignore these demands, you’ll probably end up tired or hurt. But if you face them head-on, you’ll thrive. Making it to base camp, with that amphitheater of peaks around you, feels incredible when you know you’ve earned it. Hikers often say that knowing how to handle the terrain turns big challenges into trip highlights.
Here’s what you’re really dealing with on the Annapurna Base Camp Trek:
Hike 110-120 km round-trip, with 5-8 hours on your feet each day, carrying your own pack.
Gain a total of 3,000-4,000 meters in elevation, which really tests your lungs and legs.
Face thousands of stone stairs (especially in Ulleri) if you are going via Poon Hill—your quads and calves will feel it.
Walk on uneven, rocky paths and cross streams—good balance and strong ankles help a lot.
Climb quickly above 3,000 meters, so acclimatization is a must.
Location
Elevation (m) | Elevation (ft)
Terrain Notes
Nayapul/Tikhedhunga
1,000-1,577 | 3,280-5,173
Road, then steep stone stairs.
Ulleri
2,020-2,050 | 6,627-6,726
Thousands of stone steps uphill.
Ghorepani
2,870-2,880 | 9,410-9,450
Forested paths, steady climbs.
Chhomrong
2,170-2,200 | 7,120-7,220
Village steps, ups and downs.
Bamboo/Sinuwa
2,300-2,340 | 7,550-7,680
Bamboo forest, muddy trails
Deurali
3,200-3,230 | 10,500-10,600
Rocky, forested, river crossings.
Machhapuchhre Base Camp
3,700 | 12,140
Alpine meadows, gradual ascent.
Annapurna Base Camp
4,130 | 13,550
Glacial basin, rocky ground.
For quick reference, here’s a snapshot of what you’ll see along the trail :
The bottom line: ABC trekking is moderately tough, but you can train for it. Build up your strength and endurance with regular hikes and some gym work, and you’ll feel the payoff on the trail. If you’re hunting for tips on “ABC trek physical demands,” start building your routine now. Prepare well, and you’ll take on Annapurna Base Camp with confidence.
Assessing Your Current Fitness Level Before Starting
Before you even think about the Annapurna Base Camp Trek, take a good, honest look at your fitness. Seriously, this is the step that saves you from nasty surprises halfway up the trail. A lot of beginners think they’re fitter than they really are, but a few simple tests will show you the truth about your cardio and strength. Do these checks early, so you can build a training plan that matches where you’re actually at—not where you hope to be. Sure, people search for things like “assess fitness for Annapurna Base Camp,” but nothing beats seeing how your own body performs.
In fact, cardio is the big one. You’ll be hiking five to eight hours a day at higher and higher altitudes. So, see if you can walk briskly for 5 or 6 kilometers without needing major breaks, or climb stairs for 10–20 minutes and pay attention to your breathing. If you’re wiped out fast, you need more aerobic work. If you pass, you’ve got a decent base. This is where real high-altitude training kicks off, and checking yourself every few weeks shows how much you’re improving.
But it’s not just about your lungs. Your legs and balance matter, too. Steep hills and endless stone steps will hammer your quads, calves, and ankles. Try lunges or squats—15 to 20 reps per set—and see if your knees wobble or your muscles burn out quickly. For core strength, hold a plank for 30 to 60 seconds. These moves mimic the trek, and they’ll point out exactly what to work on.
Now, about stamina. The Annapurna trek isn’t just a one-day thing. Try a 3 to 4 hour walk or hike with a light backpack. Afterward, see how fast you recover. If you struggle to bounce back, you’re risking burnout on the trail. If you have a heart rate monitor, use it. And it’s smart to check your resting pulse or blood pressure with a doctor before you dive in. Searches like “self fitness test before ABC trek Nepal” can help, but honestly, your own results matter most.
Altitude’s a wild card, even if you’re fit. But the stronger your cardio, the better you handle the climb and the less drained you’ll feel. Don’t go all out from day one. Build up gradually and avoid injuries. People who test themselves early say it boosts their confidence—and what could’ve been a weakness turns into an advantage.
Here’s a quick list to help you check your readiness for the Annapurna Base Camp Trek :
Walk 5–6 km briskly without stopping. After, see if you’re totally spent or just nicely tired.
Climb stairs or hills for 15–30 minutes. Pay attention to your legs and breath.
Do three sets of 12–20 bodyweight squats or lunges. Watch for muscle fatigue or shaky form.
Hold a plank for 45–90 seconds. This shows if your core can handle rough trails.
Keep up moderate exercise (like cycling or jogging) for 45–60 minutes and see if you can still chat comfortably.
Test Type
Beginner (Needs Work) | Moderate (Adequate)
Good (Strong Base) | Notes
Continuous Walk
Less than 3 km, need breaks | 5 km, no problem
8+ km with a pack | Build endurance for multiple days.
Stair Climbing
Less than 10 min, stop often | 20–30 min, steady
45+ min uphill | Like climbing Ulleri’s steps.
Squats/Lunges (per set)
Less than 10, poor form | 15–20, good form
25+ | Focus on lower body strength.
Plank Hold
Under 20 seconds | 45–60 seconds
90+ seconds | Core strength for balance.
Sustained Cardio
Under 30 minutes | 45–60 minutes
60–90 minutes | Aerobic stamina is key.
And here’s a simple table to show where you stand :
In the end, being honest about your fitness lets you train smarter and keeps your expectations in check for the Himalayas. Adjust your plan as you improve—progress should feel real, not forced. Focus on your own starting point, not someone else’s. Take these tests now, and you’ll set yourself up for a confident, rewarding trek to Annapurna Base Camp at 4,130 meters (13,550 feet).
How Many Weeks Do You Really Need to Train?
Here, let’s get real—most people need about 8 to 12 weeks to get ready for the Annapurna Base Camp Trek. That’s enough time to build up your stamina without pushing too hard or risking injury. If you’re starting from scratch or haven’t exercised in a while, you’ll want a little more time. On the flip side, if you’re already in decent shape, you might pull it off in 6 to 8 weeks. But honestly, it’s less about the exact number of weeks and more about showing up regularly and steadily ramping things up.
Likewise, people often search “how many weeks to train for ABC trek,” hoping for a magic number. But the real answer depends on where you’re starting from. For most folks who are somewhat active, 8 to 10 weeks is the sweet spot. You get plenty of time to work on your cardio and leg strength for those long daily hikes—think five to eight hours a day. In the beginning, focus on brisk walking or cycling to build an aerobic base, then start throwing in hills and a loaded backpack. If you’re a beginner, stretching your training to 10 or even 12 weeks helps you avoid overdoing it and keeps injuries at bay. Most guides and seasoned trekkers back up this timeline since it gives your body time to handle the altitude—over 4,100 meters, after all.
If you’re totally new to multi-day trekking, giving yourself 12 to 16 weeks pays off. Those extra weeks let you practice back-to-back long hikes, which builds mental grit and helps you get used to trail fatigue. Remember to mix in rest days so you don’t burn out. On the other hand, if you already hike pretty often, you could get by with 8 weeks or so, but you’ll want to focus on stair climbing and strength training. The main thing is to stay flexible and adjust your plan as you go.
Really, it’s not about sticking to some fixed timeline. The trick is to keep challenging yourself—make your hikes a little longer or steeper each week, and see how your body responds. If you’re already fit and try to cram everything into just 6 weeks, you might miss out on the conditioning you need for tough sections like the Ulleri stairs. Most guides say starting 2-3 months out gives you the best shot at hitting your peak right before you leave. That way, you’re ready to take on the full 110-120 km trek.
In fact, rushing through your training usually leads to exhaustion or altitude problems, but taking your time helps you avoid these pitfalls. Listen to your body, tweak your routine when you need to, and you’ll probably enjoy the trek a whole lot more. Planning a realistic timeline is what sets you up for success at Annapurna Base Camp—and lets you actually enjoy the journey.
Here’s a quick breakdown to help you decide how long to train, based on your current fitness:
Beginners or not very active: 12-16 weeks. You need the extra time to build a solid base and avoid getting hurt.
Moderately fit, some hiking experience: 8-12 weeks. This gives you room to build up endurance and strength in a steady way.
Already active or regular at the gym: 6-10 weeks. Ramp up the trek-specific stuff—long walks, weighted packs.
Ambitious trekkers: Add more weeks if you want, but stay consistent with 4-5 sessions a week and don’t skip your rest.
Everyone: Always include a taper week before your trek. Cutting back lets your body recover and store up energy.
And if you want all the details at a glance, here’s how it shakes out:
Fitness Starting Point: Beginner/Sedentary
Weeks: 12-16
Early Focus: Cardio and easy walks
Later: Add hills, backpack training, do longer days in a row
Intensity: Go slow to stay healthy
Moderately Active :
Weeks: 8-12
Early Focus: Build aerobic base, add some strength
Later: Hike longer, climb more elevation
Intensity: This works for most people
Fit/Regular Exerciser :
Weeks: 6-10
Early Focus: Build trek-specific endurance
Later: Do hikes with a weighted pack, stair intervals
Intensity: Shorter plan, but the sessions count
Very Fit/Experienced :
Weeks: 6-8
Early Focus: Fine-tune with trek simulations
Later: Hit your peak, then taper down
Intensity: Focus on recovery and getting used to altitude
Bottom line—no matter which path you’re on, what really makes the difference is sticking with your plan and pushing yourself bit by bit. That’s how you turn the Annapurna Base Camp trekking into a great experience instead of a struggle. You’ll feel more confident, and every step gets a little easier. So start counting down the weeks, put in the work, and get ready to stand at Annapurna Base Camp at 4,130 meters, feeling strong and ready for anything.
Building a Solid Aerobic Base: Cardio Essentials
Meanwhile, you can’t really skip building a solid aerobic base—especially if you’re eyeing the Annapurna Base Camp Trek. This foundation powers every single uphill climb and gets you through long, high-altitude days without burning out. Cardio training bumps up your VO2 max, which means your body learns to use oxygen more efficiently, even when you’re climbing up to 4,130 meters (13,550 feet). If you’re just starting out, go for moderate sessions. Stick with it for a few weeks and you’ll notice real stamina gains, not just average fitness. A lot of trekkers search for “cardio training for Annapurna Base Camp,” but honestly, nothing beats steady, consistent effort. Regular, steady-state cardio gets you the most reliable results.
Likewise, walking or hiking briskly is your bread and butter here. Aim for 45 to 90 minutes per session—push yourself enough that chatting feels a little tough, but not impossible. Once you’re comfortable, start adding hills. It helps to mimic the actual trek, which climbs from Nayapul at 1,070 meters (3,510 feet) up and up. If you’re in better shape, running or jogging works too. Or, protect your joints with cycling or swimming—both still ramp up your heart and lungs. When you’re putting together your plan, focus more on how long you can go, not how fast. That’s the key to lasting through those long trekking days.
Further, once you’ve got a decent base, mix things up with intervals. Alternate faster bursts with easy recovery periods. For example, walk briskly for 3–5 minutes, then jog lightly for 1–2 minutes, and repeat for 30–45 minutes. This raises your lactate threshold, which basically means you won’t get wiped out as quickly, even after 5–8 hours on the trail. Mixing up your workouts keeps things interesting, hits different muscle groups, and keeps you motivated.
Similarly, you’ll want to get in 4–5 cardio sessions each week to really build endurance. One session each week should be a longer one—2 or 3 hours—to get used to being on your feet for a whole day. Most of your workouts should still be moderate so you can recover. Pay attention to how hard you’re working—aim for about 60–75% of your max heart rate. The secret? Volume and consistency matter more than going all-out. Listen to your body to avoid burnout.
Moreover, skip this aerobic phase and you’ll feel it—early exhaustion, heavy legs, and less fun on the trail. But stick with it, and you’ll breathe easier and move with more energy. You’ll see progress in as little as 4–6 weeks. Plenty of trekkers will tell you: a strong cardio base is what lets you enjoy the scenery instead of just struggling to keep up. Be patient. That solid foundation is what opens up the whole adventure.
Here’s a quick-hit list to keep you on track—call it “Essential Cardio Workouts to Build Aerobic Base for ABC Trek”:
Brisk walks or power hikes for 45–60 minutes, 4–5 times a week; keep the pace challenging but still conversational.
Hill repeats or treadmill sessions with an incline, 2–3 times a week—think of it as practice for those Ulleri stairs.
Cycling or stationary biking for 60–90 minutes at a steady, moderate effort—great for endurance and easy on your knees.
Once a week, interval walking or jogging; switch up the intensity to build efficiency once your base is set.
Long, slow outings on weekends—2–3 hours with a light pack to get used to full trekking days.
If you want some structure, here’s a sample weekly cardio plan for Weeks 1–8 :
Week 1–2: 4 sessions of brisk, flat walking, 30–45 minutes each. Keep it easy and focus on building the habit.
Week 3–4: 4–5 sessions, start adding gentle hills, 45–60 minutes each. Push a little harder, breathe a bit heavier.
Week 5–6: 5 sessions, mix in hills and longer steady state workouts, 60–90 minutes. One interval day this week.
Week 7–8: 5 sessions, include hills, intervals, and a long outing (60–120 minutes). Add a pack to weekend hikes. Try to move at trek pace and check in with your recovery.
In fact, aerobic training isn’t glamorous, but it’s the backbone of your trek prep. It makes steep trails and thin air feel possible, not punishing. You’ll show up at Machhapuchhre Base Camp with energy left to spare, and that’s when the real fun starts. The right cardio routine turns tough climbs into pure adventure—just stick with it.
Strengthening Your Legs and Core for Steep Ascents and Descents
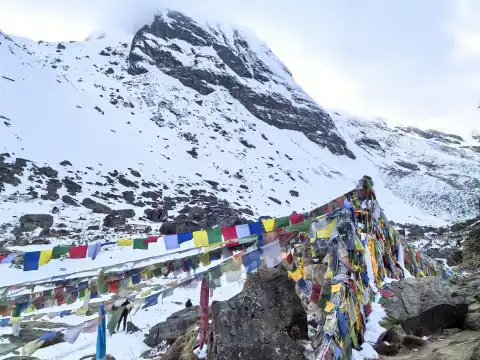
Here, let’s be honest—if you’re planning to trek to Annapurna Base Camp, most days are just endless climbs, rocky steps, and unpredictable downhills. You really need strong legs and a solid core, not just to keep up your energy, but to keep your balance when the trail gets rough. Powerful quads help you charge up those never-ending stairs in places like Ulleri. Your calves and hamstrings save your knees on the relentless descents. And if you skip leg and core training? Well, you’ll definitely feel it in your joints, especially after a long day dropping down from Chhomrong.
Actually, most people searching for “leg strength training for ABC trek” quickly realize how much targeted workouts help—suddenly, those crazy steep sections just feel more manageable, and you’re not wobbling down every step.
Most importantly, start simple. Squats and lunges are your bread and butter. Do them with just your body weight at first, then add a backpack or some weights when you’re ready. Step-ups are gold—grab a sturdy bench or use your stairs, push through your heel, and really mimic the trail. Three sets of 10-15 reps per leg gets the job done. These moves hit your quads, glutes, and hamstrings all at once, building the kind of strength that keeps you steady on uneven paths near Deurali or up at higher altitudes. Stick with it for a few weeks, and you’ll notice your legs turning into real engines, powering you through all that elevation gain.
Likewise, don’t forget your calves. Calf raises and slow heel drops are key for controlling those long, pounding downhills. Stand on the edge of a step and lower your heel slowly—your muscles will thank you later. For your core, go for planks, bird-dogs, and Russian twists. These help you keep your balance and carry your pack without swaying or losing your footing on narrow trails. If you’re new to deadlifts or good mornings, lighter weights still build the kind of resilience you’ll need.
Furthermore, mix in some balance work too. Try standing on one leg or using a Bosu ball. Ankles take a beating on loose gravel near Machhapuchhre Base Camp, and better balance means fewer twisted ankles. Three to four strength sessions a week is plenty, as long as you leave room for rest and throw in some cardio for endurance. As you get stronger, add more reps, more sets, or a bit more weight every week or two. That’s how you build up to handling 5 to 8 hours of trekking a day without burning out.
If you skip this stuff, you’ll notice—think sore muscles, cranky knees, or just dragging yourself up the trail while everyone else soaks in the views. But if you commit to leg and core work, you’ll actually enjoy the trek, not just survive it. People who train ahead of time always say it makes the difference between suffering and savoring those epic Himalayan landscapes.
Here’s a quick list to guide your training :
Key Leg and Core Exercises for Annapurna Base Camp Steep Ascents and Descents
Squats (bodyweight or weighted): 3 sets of 12-15 reps. Builds power for the climbs.
Walking or forward lunges: 3 sets of 10-12 reps per leg. Boosts stride and stability.
Step-ups onto a sturdy box (30-50 cm): 3 sets of 10-12 reps per leg. Mimics trail stairs.
Calf raises (standing or seated): 3 sets of 15-20 reps. Go slow on the way down for best results.
Plank variations: Hold 45-90 seconds. Builds core endurance so your pack feels lighter.
Want a simple weekly plan? Here’s how to structure your strength training for ABC over 8 weeks:
Week 1-2: 3 sessions/week — bodyweight squats, basic lunges; front plank and bird-dog. Focus on good form. Rest fully between workouts.
Week 3-4: 3-4 sessions/week — add in step-ups, start using light weights for squats; side planks and Russian twists. Increase reps or add dumbbells. Try foam rolling after sessions.
Week 5-6: 4 sessions/week — walking lunges, eccentric heel drops; plank with leg lifts, dead bugs. Add a loaded backpack to some sets. Keep an eye on knee and ankle comfort.
Week 7-8: 4 sessions/week — do a full circuit: squats, lunges, step-ups; dynamic planks, supermans. Bump up the reps or weight, and practice with your pack. Taper off volume in the last week so you’re fresh for the trek.
In the end, strong legs and a stable core don’t just help you push through the tough parts—they let you actually enjoy the journey. You’ll reach Annapurna Base Camp feeling accomplished, not destroyed, and with enough energy left to soak in those once-in-a-lifetime views.
The Power of Stair Training and Hill Repeats :
If you’re getting ready for the Annapurna Base Camp Trek, nothing gets your legs in shape like stair training and hill repeats. These workouts come closest to the endless stone steps and steep climbs you’ll hit every day on the trail. Your quads get stronger, your calves last longer, and your lungs get used to working hard—all at the same time. Suddenly, sections like those infamous Ulleri stairs don’t feel so brutal. Even better, you train your legs not just for the climb up, but for the pounding on the way down, which a lot of trekkers forget about—until they’re limping halfway through day two. If you’ve ever typed “stair training for ABC trek” into Google, you’ve probably already figured out that nothing matches the real deal like a set of stairs or a tough local hill.
Actually, stair climbing fires up the exact muscles you’ll use on those stone steps. Your quads and glutes get powerful, while your ankles learn to handle all the uneven ground without rolling. Hill repeats push your heart rate way up, so your whole system gets used to the long, hard effort you’ll face climbing up toward Deurali at over 3,000 meters. Both these workouts raise your lactate threshold, which keeps your legs from burning out during those marathon 5-8 hour trekking days. Do this stuff consistently, and what used to feel like a weak spot turns into your advantage—especially when you’re picking your way through rocky paths near Machhapuchhre Base Camp.
Here, start simple. Tackle stairs for a moderate amount of time, and pay attention to your form. If you drive through your heels, your knees will thank you, and those slow descents build control for the way down. Hill repeats keep things interesting—you can jog or hike up, then stroll back down while you catch your breath. This up-and-down routine boosts your VO2 max but won’t leave you wrecked for days. After a few sessions, throw on a light backpack to make it real. Searching for “hill repeats and stair climbing for Annapurna Base Camp preparation” brings you right to the point: these workouts transfer directly to the Himalayas.
Likewise, you don’t need to go overboard. Two or three sessions a week is plenty, with easy cardio or rest days in between so you don’t burn out. Progress matters more than perfection. Add more repeats, pick a higher staircase, or just move a little faster every week or two. Keep an eye on your form. Lots of seasoned trekkers swear this kind of training is the reason they reach Annapurna Base Camp with energy left, not just dragging themselves to the finish. Gym machines help, but nothing beats the real movement you’ll use out there.
Moreover, skip this kind of training, and you’ll feel it—early fatigue, sore knees, maybe even missing out on some of the best views because you’re just too tired. But if you stick with it, you’ll notice the difference. When other trekkers are struggling, you’re still charging up. And it’s not just physical—you get mentally tougher too, which matters when you’re high up in Nepal, pushing through those last few switchbacks.
Here’s what works best for stair training and hill repeats if you’re prepping for ABC:
Find a long staircase or a steep hill nearby. Shoot for 20-40 minutes of effort each time.
Nail your form—keep knees over toes, push through your heels, and land soft on the way down.
Start with 4-6 repeats; work your way up to 10-15 as you get fitter.
After three or four weeks, start carrying a backpack with 3-5 kg to practice with a real load.
Add some core work at the end, because a strong torso keeps you balanced and powerful.
Here’s a quick guide to how you might build up your training over eight weeks:
Week 1-2: Do two sessions per week. Basic stair climbing or walking up a gentle hill, then walking down. Go for 20-25 minutes, 6-8 repeats. Keep the pace easy, focus on good rhythm. No backpack yet.
Week 3-4: Bump up to 2-3 sessions a week. Power hike up, control the descent. 25-35 minutes, 8-12 repeats. Go a little faster, but still steady. Start adding a bit of speed.
Week 5-6: Three sessions a week. Fast uphill, slow and careful on the way down. 35-45 minutes, 10-15 repeats. Start carrying your pack (3-5 kg) for some repeats. Add volume, but watch your knees.
Week 7-8: Two or three sessions, interval style—push hard on the way up, jog or walk to recover on the way down. 40-50 minutes, 12-18 repeats. Simulate the pace you’ll use on the trek. Back off a bit on your last session before leaving.
Honestly, stair training and hill repeats give you the power and confidence to handle whatever the Himalayas throw at you. Every climb feels like it has a purpose, not just another slog. And that’s the difference between surviving your trek and actually enjoying every step.
Training with a Weighted Backpack: When and How to Start
If you’re getting ready for the Annapurna Base Camp Trek, training with a weighted backpack isn’t just a good idea—it’s essential. But don’t just throw on a heavy pack and hope for the best. You need to ease into it, giving your shoulders, back, hips, and legs a chance to get used to the real load you’ll carry on the trail. Jump in too soon or pile on too much weight and you’re just asking for an injury. Time things right, though, and you’ll build strength and stamina without sidelining yourself.
Actually, most trekkers start adding weight only after they’ve built a solid base of cardio and strength. You want your body ready for the stress, not shocked by it. People always wonder, “So when do I actually start backpack training for ABC?” The truth is, if you ramp up at the right pace, what used to feel tough just becomes part of your routine, and you’ll hit the trail feeling confident instead of cautious.
Here, don’t rush it—wait until you’ve put in 4-6 weeks of regular training before you add any weight. Early on, it’s all about good form, cardio, and strength work without a pack. When you do start, go easy: beginners usually start with 3-5 kg (about 6-11 pounds). If you’re already pretty fit, you can bump that up to 6-8 kg to match what you’ll actually carry—think water, snacks, an extra layer or two. Only wear the pack for longer hikes or when doing stairs or hills, so your posture stays solid and your core does its job. This helps your stabilizer muscles, and it keeps your lower back from wearing out when the trek gets tough around Bamboo at 2,300 meters.
In fact, technique matters from day one. Make sure your straps are snug and the weight sits high, resting mostly on your hips. On the way up, lean forward just a bit, but keep your core tight, especially on the way down. Start with short sessions—30 to 45 minutes—and focus on going a little longer before adding more weight. That slow build keeps overuse injuries at bay. Listen to your body: a little soreness is normal, but sharp pain means you need to step back.
Likewise, two sessions a week with the weighted pack is plenty at first. As you get stronger, you can add a third. Your best bet? Weekend hikes with your full kit, so you can see how your snacks, water, and gear actually feel out there. By weeks 7-10, most trekkers handle 7-10 kg for three hours or more—about what you’ll carry from Ghorepani onwards. Remember, the goal isn’t to see how much weight you can carry. You want to feel strong and steady, not wiped out before you even reach the start of the trek.
Further, don’t get impatient and jump into heavy loads. That’s a recipe for sloppy posture and aching joints. If you take your time, you’ll end up with better balance, stronger legs, and the kind of endurance that makes steep climbs and long descents feel a lot less daunting. Lots of trekkers say that training with weight made the real trek feel way more manageable. It’s not just about your muscles, either—it’s a mental boost knowing you’ve done the hard work.
Here’s a quick guide to get you started :
Step-by-Step Guide to Starting Weighted Backpack Training for ABC Trek
Don’t start with weight until you’ve done at least 4-6 weeks of steady cardio and strength work. Your body needs that base.
Begin with 3-5 kg in a backpack that fits well and has a hip belt. You want your legs, not your shoulders, doing the heavy lifting.
First sessions should be 30-60 minutes on flat or gentle ground. Focus on staying upright and moving well, not on covering big distances.
Build up by adding time before you add weight. Go up by 1-2 kg every week or two, and pay attention to any pain or fatigue.
Stick to 1-2 weighted hikes a week at first. Keep other cardio sessions pack-free so you can recover.
And for a clear look at how to progress, check out this timeline:
Weighted Backpack Training Timeline for Annapurna Base Camp Preparation (Weeks 4-12)
Weeks 4-6: 3-5 kg — Flat or moderate walks, stairs, 30-60 mins, 1-2 times per week. Focus on posture and even weight. If you feel sharp pain in your back or knees, lighten the load.
Weeks 7-8: 5-7 kg — Hill repeats or longer hikes, 60-90 mins, 2 times per week. Add some elevation, keep your breathing steady. If soreness lingers, take an extra rest day.
Weeks 9-10: 7-9 kg — Full simulation hikes, 2-3 hours, 2 times per week. Mix up the terrain and test your gear. If you’re exhausted too early, slow down.
Weeks 11-12: 8-10 kg — Try back-to-back long days, 2-3 times per week if you can. Walk at your trek pace, practice eating and drinking on the go. If you notice signs of overuse, start tapering before your departure.
When you commit to weighted backpack training, you’re not just prepping your body—you’re making sure carrying your essentials feels normal, not like a burden. That way, when you finally reach Annapurna, you’re ready to enjoy the journey, not just survive it.
Sample 12-Week Training Plan Overview
Here’s a quick, straightforward look at what you’ll actually do over 12 weeks to get ready for the Annapurna Base Camp Trek. The plan mixes up cardio, leg and core strength, specific stair and hill training, and, yeah, plenty of practice carrying a loaded backpack—so by the time you hit the trail, you feel ready, not wrecked.
Actually, you won’t just dive into the tough stuff from day one. The whole thing ramps up slowly, so your body gets stronger without getting hurt. The goal is to build up the stamina you need to cover 110-120 km and climb 3,000-4,000 meters in total. If you already work out a bit, you’ll find this plan doable. Beginners can stretch it to the full 12 weeks, while fitter folks might move through it faster or add intensity. Stick with it, and you’ll turn average fitness into real trekking strength—enough for those high-altitude stretches up to Annapurna Base Camp at 4,130 meters (13,550 feet).
Likewise, the first four weeks are all about laying the groundwork. You’ll focus on moderate cardio, basic strength moves, and easy-paced walks. Don’t rush to throw on a heavy pack or go crazy with hills. By week three, you’ll start adding a bit of stair or hill work, just to get used to the feeling. Rest days and lighter recovery workouts are built in, so you don’t burn out. It’s all about building good habits early—by the end of this stretch, you’ll notice you can walk farther without feeling wiped out.
Then, in weeks five through eight, things start to feel more like real trekking. You’ll hike longer, carry a lightly loaded backpack, and add more stairs or hill repeats. Strength sessions get a little tougher—think more reps or a bit of extra weight—so your legs and core can handle those monster climbs, like the Ulleri stairs or the steep drop from Chhomrong. You’ll throw in a weekly interval workout to boost your endurance even more. By week eight, you’re doing back-to-back long hikes, which gets your body ready for those multi-day pushes on the trail.
Moreover, weeks nine to eleven are the peak. Now you’re doing two or three long, weighted hikes each week, ramping up the stair and hill circuits, and keeping up with full-body strength work. This is the time to test your gear, figure out your hydration, and really dial in your pace. You’ll be working hard, but recovery days help you stay fresh. This phase gets you ready—mentally and physically—for those 5-8 hour days with a pack, especially as you climb up toward Machhapuchhre Base Camp at 3,700 meters (12,140 feet).
In fact, the final week is all about tapering. You’ll cut back on volume so your body recovers, but you’ll stay lightly active to keep everything loose. Take time to imagine the forests and those epic glacier views—get excited about what’s coming. People who stick with plans like this usually show up at the trailhead feeling stronger and more resilient than ever. The plan’s flexible, too—you can adjust based on how you’re feeling, your schedule, or your base fitness. Just stay consistent.
Here’s a simple breakdown of each phase :
Weeks 1-4: Build your aerobic base and basic strength. Get into the habit, make walks feel easy.
Weeks 5-8: Add hills, stairs, and start carrying a light pack. Bridge gym work to real trail demands.
Weeks 9-11: Tackle long, weighted hikes and higher volume. Simulate full trekking days and practice your pacing.
Week 12: Taper—focus on recovery, keep moving lightly, and arrive fresh.
Throughout: Take 1-2 rest days each week, watch for signs of overtraining, and adjust the plan if your body needs it.
For a quick at-a-glance look at what each week focuses on, here’s the core structure:
Weeks 1-4: Build your aerobic base and basic strength with 4-5 mostly flat or moderate cardio sessions and 2-3 bodyweight strength workouts. No weighted pack yet. Longest sessions last 60-90 minutes. Focus on consistency and good form.
Weeks 5-8: Shift to trek-specific endurance. Keep up 4-5 cardio sessions—now with hills or intervals—and 3-4 strength workouts (add stairs/hills). Start carrying a 3-5 kg pack once or twice a week. Aim for longer hikes up to 2-3 hours. Add elevation, introduce load.
Weeks 9-11: Peak your training with 4-5 high-intensity cardio sessions and 3-4 advanced stair/hill repeats. Hike with a 7-10 kg pack two or three times a week. Your longest hikes stretch to 4-6 hours. Simulate back-to-back trekking days and test all your gear.
Week 12: Taper with 3-4 lighter cardio sessions, 2 easy strength workouts, and one short, light pack hike (90-120 minutes). Cut total volume by 40-60% and focus on recovering well.
Stick with this plan, listen to your body, and you’ll show up at Annapurna Base Camp ready for whatever the trail throws at you.
Here, this 12-week plan gives you a real, balanced way to get ready for the trek. It sets you up to handle every tough climb and every breathless stretch with real confidence. You stop letting exhaustion take over, and you start connecting with the Himalayas on your own terms. A “sample 12-week training plan for Annapurna Base Camp” isn’t just a catchy phrase—it’s your guide to staying focused and motivated. Stick with each phase, pay attention to how your body feels, and take each step toward that legendary base camp at 4,130 meters (13,550 feet) like you mean it.
Weekly Breakdown: Weeks 1-4 ( Foundation Building)
Actually, weeks 1 to 4 really set the tone for your Annapurna Base Camp trek training. This first month is all about building your base — getting your body used to moving more, but not pushing so hard that you burn out or get hurt. You’re working on steady cardio and basic bodyweight strength, just enough to let your muscles and lungs adapt before things get tougher. Think of it as laying the groundwork, so when you’re climbing toward that 4,130-meter summit, your body’s ready.
For cardio, aim for four to five sessions a week. Brisk walks, easy jogs, or even bike rides — whatever feels good, so long as you can hold a conversation. Each session should last 30 to 60 minutes. Start on the shorter end, then bump it up by about five or ten minutes each week. By week three, start adding a few gentle hills to your walks. Nothing too crazy — just enough to get your legs used to the kind of climbing you’ll face on the trail, especially those first stretches from Nayapul.
Moreover, strength work comes in two or three times a week. You’re sticking to bodyweight moves for now: squats, lunges, step-ups, calf raises, and planks. Go for two or three sets of 10 to 15 reps (or 30–60 seconds for planks). Focus on your form — knees lined up, core tight, the whole bit. This builds the leg and core strength you’ll need for those endless stone steps and long days with a pack. Don’t rush into adding weights yet; nailing the basics now pays off later. Take a rest day between strength sessions and stretch or do some yoga on the off days so you stay flexible and limber for rough ground.
Once a week, set out for a longer walk. Start with 60 minutes and work up to 90 by the end of week four. This isn’t just about fitness — it also gets your mind used to being on your feet for hours, which is a huge part of trekking. While you’re at it, start paying attention to hydration and snacks. Get in the habit of drinking steadily and eating balanced foods during and after workouts. By week four, you’ll probably notice your breathing’s easier and your legs aren’t as sore. That’s real progress, and it keeps you motivated.
Here, don’t fall into the trap of skipping rest days or pushing too hard too soon. That just leads to burnout and frustration. Listen to your body. If you do, you’ll finish this phase feeling stronger, steadier, and honestly, more excited for what’s next.
Here’s a quick rundown of what your main workouts look like in weeks 1–4:
Brisk walking, jogging, or cycling 4–5 times a week, 30–60 minutes each, easy enough to chat while you move.
Squats and lunges (bodyweight), 2–3 sets of 12–15 reps — these are your uphill power builders.
Step-ups and calf raises, 2–3 sets of 10–15 per leg, getting your legs ready for all those stairs.
Planks, 2–3 sets of 30–60 seconds, focusing on steady breathing and a solid core.
One longer walk every weekend, building from 60 up to 90 minutes.
To keep things organized, here’s how your weeks might look :
Week 1: Cardio 30–40 min easy pace, basic strength moves, 60 min long walk — focus on building the habit and nailing your form.
Week 2: Cardio 40–50 min, add step-ups and calf raises, 70 min long walk — start nudging your sessions a bit longer.
Week 3: Cardio 45–55 min, throw in some gentle hills, do a full strength circuit, 80 min walk — let your legs feel those inclines.
Week 4: Cardio 50–60 min, keep up the sets and maybe add a few more reps, 90 min long walk — lock in the gains and check that you’re recovering well.
By the end of these four weeks, you’ll have a real foundation. This makes everything that comes next — more difficult hikes, heavier packs, steeper climbs — so much more doable. You’ll be ready to tackle the Himalayas with a lot more confidence. Stick with it, rest when you need to, and you’ll feel the difference when you finally hit those high trails.
Weekly Breakdown: Weeks 5–8 (Building Strength and Endurance)
Actually, weeks 5 to 8 are where your training really starts to feel like you’re prepping for the Annapurna Base Camp Trek. This is when you crank up the challenge: weighted backpacks, hill repeats, longer sessions. It’s not just about moving more—it’s about moving smarter, getting your body used to the real ups and downs you’ll face on the trail.
Here, you’re building on the cardio foundation from the first month, but now you’re throwing in extra load and elevation to get ready for steep climbs like the Ulleri stairs and those long stretches up to 4,130 meters. Intensity goes up bit by bit, but you still need those rest days and light recovery moves to keep everything running smoothly. If you’ve found yourself searching for “ABC trek training weeks 5-8,” you’re not alone—this is the stage where you really start to notice stronger legs and better stamina.
Likewise, your cardio steps up to 4 or 5 sessions a week, and they get a bit more focused. You’ll do hill repeats or hit the treadmill on an incline two or three times. Keep one day for intervals to work on your speed and efficiency. Sessions stretch out—plan for 60 to 90 minutes—so your heart rate climbs, but you’re still mostly in that aerobic zone. Start hiking with a light pack (3-5 kg) once or twice a week. Carrying weight helps your posture and makes your legs work the way they’ll need to out on the trail. This is the sweet spot for building endurance and getting used to trekking for hours without burning out early.
Similarly, strength sessions move up to 3 or 4 times a week. Weighted squats, lunges, step-ups, calf raises—do three sets of 10 to 15 reps with dumbbells or your pack. Core work gets tougher too; think dynamic planks and bird-dogs, so your torso can handle the wobbly downs from places like Chhomrong. Hill or stair repeats are now a staple. Shoot for 8 to 12 ascents each time, keeping your descents controlled to build strength that protects your joints. Good form still matters—don’t rush it, or your knees and ankles will let you know.
On weekends, your long hikes should hit 2 to 3 hours, pack on your back, hunting for routes with some real elevation. By week 8, try doing two long days in a row—get used to what tired really feels like so it doesn’t catch you off guard on the trek. Use these hikes to dial in hydration, snacks, and blister prevention. This is where you figure out what works for you, not just what looks good on paper. Most trekkers notice their legs getting stronger and their breathing easing up by the end of this block, and workouts start to feel a lot more like the trail itself.
But, don’t try to tough out sharp pain or skip recovery days. That’s how you get sidelined. Smart tweaks keep you moving forward. By the end of week 8, you’re set up for the biggest training weeks ahead.
Here’s your core workouts checklist for weeks 5–8 :
Hill repeats or stair climbs 2-3 times a week, 8-12 ascents with your pack—this is your ticket to powering up steep trail sections.
Weighted squats, lunges, and step-ups, 3 sets of 10-15 reps—so your legs can handle the load and the inclines.
Dynamic core moves like planks and twists, 3 sets—keep your form tight.
One interval cardio session a week, 45-60 minutes, alternating effort—this keeps your aerobic system sharp.
Weekend long hike, 2-3 hours with 3-5 kg in your pack—this is how you get ready for all-day trekking.
And here’s a rough week-by-week schedule :
Week 5: Cardio for 60 minutes with some hills or intervals, basic weighted strength, one pack session (3-4 kg), longest hike at 2 hours. Focus on easing into the heavier load and making sure your gear fits right.
Week 6: Cardio for 65-75 minutes, add more elevation, include calf eccentrics in strength, one or two pack sessions (4-5 kg), hike up to 2.5 hours. Up the reps and keep an eye on your posture.
Week 7: Cardio for 70-80 minutes, mix in steady and interval work, full weighted circuit, two pack sessions (5 kg), hike 2.5-3 hours. Build volume and practice staying hydrated.
Week 8: Cardio for 75-90 minutes with a hill focus, advanced repeats in strength, two pack sessions (5-6 kg), a 3-hour hike (plus an optional back-to-back day). Pull everything together, and check how you’re recovering.
Bottom line—these four weeks build the strength and endurance you need to make those Himalayan climbs not just possible, but actually enjoyable. Stick with it, recover well, and notice how much stronger you’re getting. This is the “ABC trek weeks 5-8 endurance phase” that sets you up for the summit. Keep moving forward—you’ve got this.
Weekly Breakdown: Weeks 9–12 (Peak and Taper)
Meanwhile, weeks 9 through 12 are the real make-or-break stretch for your Annapurna Base Camp Trek prep. This is where you hit your highest training load and then pull back just in time to show up strong, rested, and ready for those big mountains. For weeks 9 to 11, you’re basically simulating those long, tough trekking days—back-to-back hikes with a loaded pack, pushing your endurance to the edge. Think long days, 5 to 8 hours on your feet, covering a ton of ground, and feeling that cumulative fatigue.
Then, week 12 is all about the taper: you ease off, let your body recover, and bank all that hard-earned fitness. By the end, you’re not just prepared—you’re confident you’ll handle the altitude and distance all the way up to Annapurna Base Camp at 4,130 meters.
Here, during weeks 9 to 11, your cardio and simulation workouts hit their peak. You’re training 4 or 5 times a week, focusing on hills, stairs, and long hikes with a heavy pack. There’s still one interval session to keep things sharp, but most workouts are steady, moderate-to-hard efforts. Your backpack gets heavier—7 to 10 kg—so your body learns exactly what it’ll need to do out there. These are the weeks to wear every bit of your gear: boots, poles, water system, all of it. No surprises.
Likewise, strength training sticks around too, three times a week. But now it’s more about maintaining power, not building more bulk. You’re doing circuits—lots of reps with squats, lunges, step-ups, calf drops, and plenty of core. Hill and stair repeats are still in play, 12 to 18 ascents each session, focusing on good form both up and down. This matters, especially for your knees, which will take a beating on the steep descents near Deurali and other high points. And somewhere in week 10 or 11, try for one or two back-to-back long days, if your recovery’s been solid. You want to know you can string together big efforts, not just survive once.
Further, come week 12, you shift gears. The hard work’s done. You’re down to three or four light sessions—short walks, easy yoga, maybe a few flights of stairs without your pack. Cut your volume almost in half, keep things gentle, and focus on letting your muscles recharge. This is where your legs start to feel light again. Spend some time picturing yourself on the trail—rhododendrons, glaciers, Machhapuchhre rising ahead. Most people notice they’re sleeping better and feeling less sore right as they’re packing for the trip. That’s the magic of a good taper.
Similarly, don’t get greedy now. If you overtrain during the peak or skip your taper, you’ll just show up tired and flat. Better to stick to the plan—hit your peak, then back off. You’ll finish up tougher, fresher, and mentally dialed-in.
Here’s your quick hit-list for weeks 9–12—the core workouts that count :
Do 2 or 3 long hikes a week in weeks 9 to 11, each lasting 3 to 6 hours, with that 7-10 kg pack. This is as close as you’ll get to the real thing.
Advanced stair or hill repeats, 2-3 times a week, 12-18 climbs per session. Focus on good form, especially on the way down.
Strength circuits, 3 days a week. Go for 3 sets of 12-20 reps, using weights, to keep your power up.
In week 12, swap in light recovery—short walks or yoga, 30-45 minutes. No heavy lifting or hard hikes.
Try one back-to-back simulation day in week 10 or 11 if you’re feeling good. It’s the best test of your stamina.
For a clearer view, here’s how each week stacks up:
Week 9: Cardio sessions run 75-90 minutes with tough hills or intervals. Strength circuits and stair repeats, 2-3 heavy pack hikes (7-8 kg), and at least one long session of 4-5 hours. This is about maxing your volume and dialing in your gear.
Week 10: Up to 80-100 minutes cardio, focus on higher elevations. Advanced repeats, 3-4 sets, 2-3 heavy pack hikes (8-9 kg), long day of 5-6 hours, maybe back-to-back. Push yourself but watch your recovery.
Week 11: Cardio peaks at 90 minutes, keep up maintenance circuits, 2 sessions with the heaviest pack (9-10 kg), long trek of 5-6 hours. It’s about locking in your gains and refining your pacing.
Week 12: Just 3-4 light workouts, one or two easy strength or hill sessions, maybe one short walk with a pack or none at all. Longest session is 90-120 minutes. Taper hard—rest, focus, visualize.
In fact, these last four weeks are the payoff for all your training. Go hard when it’s time, then pull back and trust the process. When you finally step out toward Annapurna Base Camp, you’ll be ready—body and mind. Rest, picture your success, and get excited. You’re almost there.
Common Mistakes to Avoid During Training
Actually, a lot of trekkers mess up their prep for the Annapurna Base Camp Trek by skipping the basics or jumping into heavy workouts way too soon. That just leads to injuries or burning out before you even hit your peak training weeks.
Honestly, you need those first 4-6 weeks to build up your aerobic base and basic strength. If you jump straight into hard, high-intensity stuff, your muscles and joints just aren’t ready, and you wind up sidelined. People always want quick results, but going slow at first means you’re way less likely to get things like shin splints, knee pain, or those annoying IT band problems, especially with all the steep stone steps on the trail. If you’re searching for “common mistakes in ABC trek training,” this is a big one people miss—rushing now only sets you up for trouble later, especially at those high altitudes up to 4,130 meters (13,550 feet).
Likewise, another thing that trips folks up: ignoring recovery. Too many trekkers push through fatigue, skipping rest days or active recovery sessions. That small muscle ache you ignore? It turns into a real injury if you don’t let your body catch up. You’ve got to schedule at least 1-2 full rest days every week, plus some lighter active days. Sleep, good food, and a little mobility work do wonders. Watch out for signs like constant soreness, bad sleep, or suddenly getting worse instead of better. A lot of people ignore these red flags until they have no choice but to stop. Taking recovery seriously makes a huge difference and keeps your motivation up through all 12 weeks.
Here, let’s talk form. Bad technique during strength work or stair sessions leads to all sorts of problems—knees, ankles, lower back, you name it. Focus on doing each move right: knees over toes, drive through your heels, keep your core tight—especially when you start adding backpack weight. Don’t rush or try to show off with heavier loads before you’re ready. Moving slow and with control keeps you safe, especially on the long descents from places like Chhomrong (2,170 meters, 7,120 feet) or those rocky patches near Deurali (3,200 meters, 10,500 feet). Fixing your form now means way fewer regrets on the trail.
Likewise, there’s also the mistake of thinking any old gym workout will do. If you aren’t training with stairs, hills, or a weighted pack, you’re not really getting ready for what’s coming. Those flat treadmill miles just don’t cut it when you’re facing endless stone steps or steep downhills. Get used to the real thing early—do long hikes with your pack and poles, not just at the last minute. Otherwise, you’ll discover blisters or an uncomfortable pack when you’re out there with no easy way back.
Further, even the most dedicated trekkers can fall into these traps, but knowing what to watch for—and making changes—keeps your training on track. The key? Stay humble, listen to your body, and focus on steady progress.
Here’s a quick list to keep you out of trouble :
Don’t rush heavy loads. Start light (3-5 kg) after the first 4-6 weeks, then build up slowly.
Don’t skip rest and recovery. Plan full rest days, and watch for signs of overtraining like constant tiredness.
Don’t sacrifice form for more reps or heavier weight. Nail your technique on every squat, lunge, and stair step.
Don’t rely just on flat cardio. Add hills, stairs, and weighted hikes to match what you’ll actually face.
Don’t ignore gear testing. Practice with your real pack, shoes, and poles on long sessions to avoid nasty surprises.
Mistake | Why It Hurts
How to Avoid It
What You Get If You Fix It.
Too much too soon | Strains, shin splints, burnout
Go gradual over 12 weeks, start light
Stronger, injury-free finish.
No rest days | Chronic fatigue, slow progress
Take 1-2 full rest days plus easy active days
Faster gains, better mood.
Bad form | Knee, back, ankle pain
Watch your technique, film yourself if needed
Safer treks, less pain afterward.
No trek-specific training | Flat workouts don’t prepare you for hills or stairs
In fact, avoiding these mistakes transforms training from a grind into something you actually look forward to. You get to enjoy every rhododendron forest and mountain view without worrying about injuries or setbacks. Stay sharp, keep adjusting, and you’ll be more than ready when it’s time to hit the trail.
Additional Tips: Nutrition, Hydration, Rest, and Altitude Awareness
Here, let’s get real—nutrition is your fuel, both when you’re training for the Annapurna Base Camp Trek and on the trail itself. If you want to last through those long sessions and recover faster, you need balanced meals. Load up on complex carbs like oats, rice, or sweet potatoes for steady energy. Don’t skip the protein—chicken, eggs, lentils, or paneer help your muscles bounce back after tough stair climbs or hill repeats. Actually, healthy fats from nuts, avocados, and seeds keep your joints happy. And every day, get a rainbow of fruits and veggies for vitamins and antioxidants—these fight off inflammation and keep you in the game. People are always hunting for “nutrition tips for ABC trek preparation,” but honestly, it’s the small, consistent habits that stop you from hitting a wall on those steep stretches toward Machhapuchhre Base Camp at 3,700 meters.
Now, hydration isn’t optional—it’s essential. Aim for at least 3-4 liters of water a day, and drink more if you’re sweating buckets or trekking in the heat. On longer hikes, toss an electrolyte packet or a pinch of salt into your water; you lose a ton of sodium through sweat, and that’s what leads to cramps and fatigue, especially at altitude. Sip often instead of chugging so your stomach doesn’t rebel during those 5-8 hour pushes. On the trek, stick to boiled or treated water to dodge stomach bugs, and always carry a reusable bottle with purification tablets. This way, you don’t get caught off guard as you climb to Annapurna Base Camp at 4,130 meters.
Moreover, rest and recovery are just as important as any workout. Honestly, a couple of full rest days each week—and some lighter active recovery like gentle walks or yoga—do more for your progress than just piling on extra miles. Shoot for 7-9 hours of sleep every night; that’s when your body gets busy repairing muscles and boosting your immunity. After those heavy backpack days, break out the foam roller, stretch, or treat yourself to a light massage. And if you’re feeling sore all the time, pay attention—your body’s telling you to slow down. Good rest stops burnout and keeps you fired up for those last, tough training weeks.
Likewise, altitude isn’t something you can just power through. Once you’re above 3,000 meters, the risk of acute mountain sickness gets real, no matter how fit you are. So, know the symptoms: headache, nausea, dizziness. Stick to the “climb high, sleep low” rule when you can. If you can squeeze in some training hikes at higher elevations before your trek, that’s even better—it’ll show you how your body reacts. For some people, talking to a doctor about Diamox makes sense as a backup. And yeah, if you’re searching “altitude preparation tips for Annapurna Base Camp,” you’ll see it’s all about slowing down and staying hydrated. With the right approach, those challenges turn into manageable steps.
Therefore, skip these basics, and even the best training plan falls short. But if you weave them into your routine, you set yourself up for a safer, more enjoyable trek.
Here’s how you can put it all into practice—check this list, “Practical Tips for Nutrition, Hydration, Rest, and Altitude in ABC Trek Training”:
Eat balanced meals with carbs, protein, and fats before and after workouts—fuel up, recover strong.
Drink 3-4 liters of water daily, and add electrolytes on heavy training days to keep cramps and fatigue at bay.
Prioritize 7-9 hours of sleep and 1-2 rest days each week, but mix in active recovery like yoga to stay flexible.
Learn the signs of altitude sickness and go at a slow, steady pace—awareness keeps you safer above 3,000 meters.
Test your snacks and hydration plan on long hikes, so nothing surprises you during the trek.
Category
Daily/Weekly Target
Why It Matters | Practical Action on Trek/Training
Nutrition
Balanced meals + snacks every 2–3 hours
Keeps energy up, repairs muscles | Carry nuts, energy bars, dried fruit.
Hydration
3–4 L water + electrolytes
Cuts down cramps, helps with altitude | Sip often, use purification tablets.
Rest
7–9 hrs sleep + 1–2 rest days
Recovery, fewer injuries | Foam roll, stretch after training.
Altitude Awareness
Know symptoms, slow your pace
Lowers AMS risk above 3,000 m | Climb high/sleep low, watch your breathing.
And for a quick look, here’s a cheat sheet—“Key Guidelines: Nutrition, Hydration, Rest, Altitude for Annapurna Base Camp Preparation”:
In summary, these extra steps round out your prep and help you reach Annapurna Base Camp at 4,130 meters feeling strong, hydrated, rested, and sharp. Work them into your routine, pay attention to your body, and go enjoy the adventure.
Final Thoughts: Arriving in Nepal Confident and Ready
Here, you’ve made it. All those months of smart, steady work paid off, and now you’re stepping off the plane in Nepal, actually ready for the Annapurna Base Camp Trek. You’re not just hoping you have what it takes—you know you do. Your legs and lungs are used to the grind, your core is solid, and hiking with weight is just another day for you now. That 110-120 km journey, all those thousands of meters up and down, feels possible. Even the idea of thin air at 4,130 meters doesn’t rattle you. Instead of nerves, there’s this quiet excitement as you roll into Kathmandu or Pokhara, looking forward to what’s coming.
But it’s more than physical preparation. You’ve already practiced habits that keep you safe and make the trek way more enjoyable. Hydration, eating well, sleeping right, paying attention to altitude—these aren’t just things you read about. You’ve lived them during your training hikes. Your gear feels like it was made for you. You know how to pace yourself so you don’t burn out early. Even when you’re tired, you can keep your head in a good place. Other trekkers talk about the moment they reach Machhapuchhre Base Camp and realize they’re actually enjoying it, not just surviving. That’s what you’ve set yourself up for: panoramic views, not endless struggle. You’ve earned every single one.
And this confidence? People notice it. You move steadily while others pause to catch their breath. You’re the one offering a smile or encouragement to someone who’s struggling. The trek turns into a celebration of what you’ve built, not just a test of how much you can take. You stay humble, though. You listen to your body, stick to acclimatization days, and follow the “climb high, sleep low” rule so you stay safe. That’s how you actually enjoy the sanctuary of the high mountains. When people talk about “arriving ready and confident for Annapurna Base Camp trek,” this is exactly what they mean. All those disciplined weeks brought you here.
Of course, reaching Annapurna base camp isn’t the end. The stories and strength you gain come home with you. You’ve proved to yourself that consistent effort beats doubt every time, and that lesson stays with you, wherever you go next.
Keep these mindset reminders close as you arrive in Nepal for your ABC Trek :
Trust your training. Your body and mind are ready.
Pace yourself, especially on the climbs. Slow and steady gets you there.
Stay present. Notice every sunrise, every scent of the forest, every shape of the mountains.
Listen to your body and your guides. Adjust if you need to.
Celebrate small wins each day—every step counts.
Preparation Element
What It Gives You on the Trail
Resulting Experience
Aerobic base & cardio
Efficient breathing, steady energy
Hours of progress without getting wiped out.
Leg/core strength
Power on climbs, control on descents
Confidence on stairs and rocky paths.
Stair/hill & weighted work
Comfort with loads and rough terrain
Moving naturally, less soreness.
Nutrition, hydration, rest
Fast recovery, fewer cramps or headaches
Consistent energy, day after day.
Altitude & mental readiness
Calm focus, positive mindset
Real joy in the Himalayan sanctuary.
And here’s a snapshot of what you’ve earned from your training :
In fact, you’re not arriving in Nepal as a beginner anymore. You’re ready to meet those mountains head-on. The forests, rivers, villages, and peaks are waiting. Take it all in. “Confident arrival Annapurna Base Camp trek Nepal”—that’s the story you’re living now. Safe travels, breathe deep, and let the adventure unfold. You’ve earned every bit of it.
FAQ to support "How to Train for Annapurna Base Camp Trek"
1. How Fit Do You Need to Be for Annapurna Base Camp Trek? The Annapurna Base Camp Trek is not about climbing skills.. Being in good shape really helps. You will be walking for hours every day on trails that are really steep. So exercising regularly before the trek is an idea. It helps you build endurance and feel more confident. Most people who are healthy can complete the Annapurna Base Camp Trek if they prepare properly. If you train for least eight weeks you will get the best results.
2. How Months Should I Train Before Annapurna Base Camp Trek? You should train for two to three months before the Annapurna Base Camp Trek. This gives your body time to get stronger and build stamina. It also reduces the chance of getting hurt during the trek. If you are new to trekking you may need time to train. Walking, hiking and doing strength exercises are ways to get ready for the challenging mountain trails of the Annapurna Base Camp Trek.
3. What Cardio Exercises Are Best for Annapurna Base Camp Trek? You need to do cardio exercises to get ready for the Annapurna Base Camp Trek. Walking, jogging, cycling, swimming and climbing stairs are all choices. These exercises make your heart and lungs stronger. This means you can handle the uphill parts of the trek more easily. Try to do cardio exercises for least 30 to 60 minutes several times a week to prepare for the Annapurna Base Camp Trek.
4. Is Hiking the Best Training for Annapurna Base Camp Trek? Yes hiking is one of the ways to prepare for the Annapurna Base Camp Trek. It is similar to what you will experience on the trek. Hiking also helps you build endurance, balance and strong legs. Try to hike on hills much as you can. Carrying a backpack while you train also helps your body get used to the conditions of the Annapurna Base Camp Trek.
5. How Important Is Leg Strength for Annapurna Base Camp Trek? Having legs makes the Annapurna Base Camp Trek a lot easier. The trail has stone steps and steep parts. So exercises like squats, lunges and step-ups are really helpful. These exercises make the muscles in your legs stronger, which is important for the Annapurna Base Camp Trek. Stronger legs also help you feel less tired on days of trekking.
6. Should I Practice Stair Climbing Before Annapurna Base Camp Trek? Stair climbing is preparation for the Annapurna Base Camp Trek. Many parts of the trail involve walking and downhill for a long time. So exercising on stairs helps you build endurance and strong legs. Start with sessions and gradually make them harder. This exercise is similar to what you will experience on the Annapurna Base Camp Trek.
7. How Can I Improve My Endurance for Annapurna Base Camp Trek? You build endurance by exercising. Long walks, hikes, cycling and jogging are all ways to do this. Increasing the time you exercise gradually also helps your body get used to it. It is better to exercise than to try to do too much, at once. If you train your endurance properly you will enjoy the Annapurna Base Camp Trek more. Feel less tired.
8. Do I Need Strength Training for Annapurna Base Camp Trek? You should definitely do strength training before the Annapurna Base Camp Trek. Annapurna Base Camp Trek requires muscles to support your joints and help you stay stable. Exercises like squats and lunges are really good for this. They work great for the Annapurna Base Camp Trek. You will also be able to carry your backpack comfortably. A good strength training program will reduce the strain on your body during the days of trekking on the Annapurna Base Camp Trek.
9. How Walking Should I Practice Before Annapurna Base Camp Trek? Walking is the important thing to do to get ready for the Annapurna Base Camp Trek. You should try to walk times a week. Try to walk a bit farther each time. Going for hikes on the weekends is an idea. Walking on terrain will help you get better balance and feel more confident on the Annapurna Base Camp Trek. If you walk regularly your body and mind will be ready for the Annapurna Base Camp Trek.
10. Should I Train with a Backpack Before Annapurna Base Camp Trek? Yes you should train with a backpack before the Annapurna Base Camp Trek. On the Annapurna Base Camp Trek you will have to carry a backpack every day. So it is an idea to practice walking with a backpack. Start with a backpack and gradually add more weight. This will help your body get used to it. You will have posture and balance on the Annapurna Base Camp Trek.
11. Can Beginners Successfully Train for Annapurna Base Camp Trek? Yes beginners can definitely get ready for the Annapurna Base Camp Trek. Many people have done the Annapurna Base Camp Trek for the time and had a great experience. The key is to start and gradually increase your training. Start with walks and basic exercises. Then keep increasing your training. If you keep at it you will be able to do the Annapurna Base Camp Trek comfortably.
12. What Role Does Flexibility Play in Annapurna Base Camp Trek Training? Flexibility is important for the Annapurna Base Camp Trek because it helps you move efficiently. Stretching exercises will help your muscles recover. Feel less stiff. If you are flexible you will be less likely to get hurt on the Annapurna Base Camp Trek. You should stretch after you work out and hike. This will help you move comfortably on the trails of the Annapurna Base Camp Trek.
13. How Can I Prevent Injuries While Training for Annapurna Base Camp Trek? To avoid getting hurt while training for the Annapurna Base Camp Trek you should not try to do much too quickly. You should always warm up. Stretch before you work out. It is also important to take rest days so your muscles can recover. Wearing the shoes while you train will also help. If you are careful and balanced in your training you will be able to get ready for the Annapurna Base Camp Trek without getting hurt.
14. Does Physical Training Help with Altitude on Annapurna Base Camp Trek? Physical training will not completely prevent you from getting sickness on the Annapurna Base Camp Trek. However it will help you be more fit and able to handle the trekking. This means your body will be able to handle the altitude of the Annapurna Base Camp Trek more comfortably.. It is still very important to acclimatize to the high altitude. If you combine training with a sensible trekking pace you will be well prepared for the high altitude of the Annapurna Base Camp Trek.
15. What Is the Best Weekly Training Plan for Annapurna Base Camp Trek? A good weekly training plan for the Annapurna Base Camp Trek should include cardio, strength training and hiking. For example you could do cardio three times a week strength training twice a week and one long hike. You should also make time for stretching and recovery. This will help you build endurance, strength and flexibility for the Annapurna Base Camp Trek. If you follow this plan you will be well prepared, for the Annapurna Base Camp Trek.